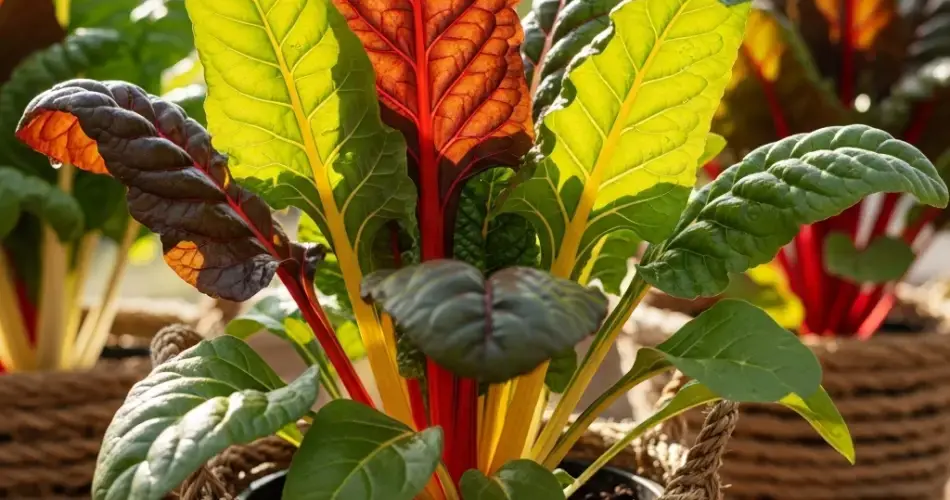
Swiss chard is a colorful and versatile leafy green that thrives in a wide variety of growing conditions. Known for its vibrant stems in shades of red, yellow, pink, and white, this nutritious plant is both ornamental and edible, making it a wonderful choice for container gardening. One creative and space-efficient way to grow Swiss chard is by using baskets. Basket gardening not only saves room but also adds rustic charm to balconies, patios, and small gardens.
This guide walks you step by step through the process of planting, growing, and caring for Swiss chard in baskets, ensuring you enjoy a steady harvest of fresh greens throughout the season.
Why Grow Swiss Chard in Baskets?
Swiss chard is an excellent candidate for basket gardening for several reasons:
- Space-saving: Perfect for gardeners with limited room, such as apartment balconies or compact yards.
- Decorative appeal: The colorful stems and large leaves create an eye-catching display.
- Mobility: Baskets can be moved to capture sunlight or sheltered during bad weather.
- Pest reduction: Elevating plants in baskets makes it harder for soil pests to attack.
Whether you’re new to gardening or looking to maximize a small space, growing Swiss chard in baskets combines functionality with beauty.
Step 1: Choose the Right Basket
Select a basket that provides ample space for root growth and good drainage.
- Size: At least 12–14 inches wide and 10 inches deep to allow roots to spread.
- Material: Woven baskets, wire baskets with coir liners, or sturdy plastic containers all work.
- Drainage: Ensure the basket has holes or a breathable lining to prevent waterlogging.
If using a natural woven basket, line the inside with burlap or coconut coir to hold the soil in place while still allowing drainage.
Step 2: Prepare the Soil
Swiss chard thrives in rich, well-draining soil. For best results, prepare a potting mix that provides nutrients and aeration.
A simple blend includes:
- 2 parts quality potting soil
- 1 part compost for fertility
- 1 part perlite or coarse sand for drainage
Before planting, mix in a balanced slow-release fertilizer or a handful of organic compost to give the plants a strong start.
Step 3: Planting Swiss Chard Seeds or Seedlings
Swiss chard can be grown either from seeds or from young transplants.
- From seeds: Sow seeds directly into the basket about ½ inch deep and 2–3 inches apart. Once seedlings sprout, thin them to 6–8 inches apart to give each plant room.
- From seedlings: Gently transplant them into the prepared soil, spacing them 8 inches apart.
If you want a colorful display, plant a mix of different stem varieties. This will not only give you variety in flavor but also make your basket more visually appealing.
Step 4: Light and Temperature
Swiss chard grows best in cooler weather but can tolerate a range of conditions.
- Light: Provide 4–6 hours of direct sunlight daily. In very hot climates, partial afternoon shade helps prevent stress.
- Temperature: Swiss chard thrives in temperatures between 50°F and 75°F (10–24°C).
Because baskets are portable, you can move them around to balance sun exposure throughout the season.
Step 5: Watering and Fertilizing
Consistent moisture is key to healthy chard leaves.
- Watering: Check soil daily, especially in warm weather. Water when the top inch feels dry, ensuring that water drains out the bottom.
- Mulching: Apply a thin layer of straw, leaves, or coir on top of the soil to retain moisture.
- Fertilizing: Feed plants every 3–4 weeks with a liquid organic fertilizer, compost tea, or seaweed extract to keep growth strong.
Because baskets dry out faster than garden soil, regular monitoring is especially important.
Step 6: Ongoing Care
Swiss chard requires little maintenance once established, but a few simple practices help extend the harvest:
- Pruning: Remove yellow or damaged leaves to encourage new growth.
- Pest management: Watch for aphids, leaf miners, and slugs. Handpick pests or use organic sprays such as neem oil.
- Air circulation: Baskets naturally improve airflow, reducing fungal problems.
Keep your plants well-trimmed and monitored, and they will produce for months.
Step 7: Harvesting Swiss Chard
Swiss chard can be harvested in two main ways:
- Cut-and-come-again method: Pick the outer, larger leaves when they are 6–8 inches long, leaving the inner leaves to continue growing.
- Full harvest: When the plant matures, cut the entire plant at the base.
Regular harvesting encourages continuous growth. Younger leaves are tender and perfect for salads, while mature leaves are excellent for sautéing, soups, or stews.
Step 8: Extending the Harvest
One of the advantages of Swiss chard is its long growing season. In mild climates, it can grow almost year-round. For continuous harvests, plant seeds every few weeks in separate baskets to ensure a steady supply.
Conclusion
Growing Swiss chard in baskets is a practical and visually striking way to enjoy fresh greens at home. With the right container, fertile soil, proper watering, and regular harvesting, your basket-grown chard will provide months of nutritious leaves. This method not only makes the most of small spaces but also adds beauty and color to your balcony or garden.
Whether you’re an experienced gardener or just starting, basket planting offers a rewarding way to bring vibrant Swiss chard into your daily meals and outdoor spaces.
