
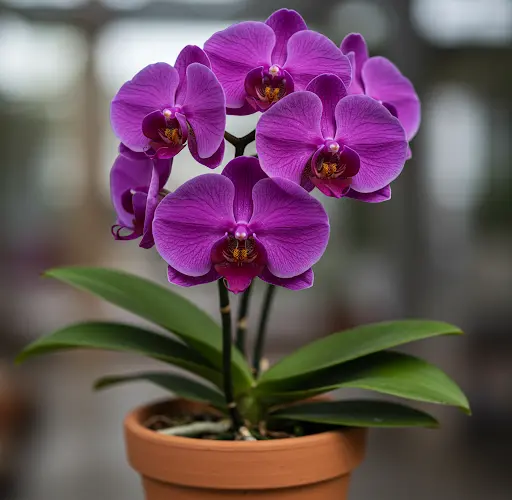
Orchids have a special way of transforming a home. Their elegant flowers, sculptural roots, and long-lasting blooms bring a sense of calm and beauty to any space. Over time, I’ve developed a simple yet highly effective care routine that keeps my orchids healthy, vibrant, and blooming again and again. Today, I’m sharing exactly how I care for them, what I feed them, and the small seasonal adjustments that make a big difference.
Watching for New Growth
One of the most exciting moments for any orchid grower is spotting a new flower spike. Recently, I noticed fresh spikes emerging from several of my orchids. On one plant, after pruning an old flower spike, a brand-new spike developed from a node along the trimmed stem. On another, two new spikes appeared at the same time—one growing from the base of the plant and another extending from an older branch.
These are clear signs that the plant is happy and thriving. Healthy orchids often reward good care with repeated blooming cycles. One of my orchids bloomed continuously throughout the summer, rested briefly for about two months, and then began producing new spikes once again. Along with the spikes, I observed strong, vibrant green roots forming—another indication of excellent health.
The Importance of Light and Temperature
Light is one of the most critical factors in orchid care. I keep my orchids on a table near a window where they receive bright, indirect sunlight. Direct sun can scorch the leaves, but filtered light encourages strong growth and spike formation.
Another essential element is seasonal temperature change. Orchids need to “feel” the transition from warm to cool seasons in order to produce new flower spikes. In early autumn, I leave my window slightly open at night so the plants experience cooler air. When nighttime temperatures drop to around 15–16°C (59–61°F), it stimulates the orchid to begin forming spikes.
Without this subtle drop in temperature, orchids may remain leafy and healthy but fail to bloom. The aerial roots and leaves play a role in sensing environmental changes, so allowing them to experience fresh, cooler air can make all the difference.
Homemade Orchid Fertilizers
I prefer using natural, homemade fertilizers rather than chemical products. These gentle, nutrient-rich solutions nourish my orchids without overwhelming their roots.
One of my favorite treatments is garlic-infused water. I crush one clove of garlic and let it soak in a glass of water overnight. If I’m short on time, a few hours will also work. Garlic has natural antibacterial properties and provides mild stimulation for root health.
Instead of soaking the entire plant, I carefully spoon about four to five spoonfuls of the garlic water directly onto the aerial roots. This targeted method prevents excessive moisture, which can lead to root rot.
In addition to garlic water, I rotate several other natural fertilizers:
- Banana peel water – Rich in potassium and magnesium, which support flowering and overall plant strength.
- Eggshell water – A source of calcium that helps maintain strong cell structure.
- Potato peel water – Contains phosphorus, which promotes healthy root development.
- Rice water – Provides trace nutrients that gently feed the plant.
Each week, I alternate between these different solutions. This rotation ensures my orchids receive a balanced range of nutrients without the risk of buildup or deficiency.
A Careful Watering Routine
Proper watering is crucial for orchids. I never water on a fixed schedule. Instead, I watch the roots. When orchid roots turn silvery-white, it means they are dry and ready for moisture. When they are green, they are still hydrated.
I always use fresh, dechlorinated water and avoid using tap water straight from the faucet. Overwatering is one of the most common causes of orchid failure. Too much moisture can suffocate the roots and cause rot.
Some growers prefer the soaking method, submerging the pot in water for 10–15 minutes and allowing it to drain completely. This method works well, but if used, it’s important to wait about two weeks before watering again to prevent excess moisture buildup.
Managing Leaves and General Maintenance
Occasionally, an older orchid leaf will turn yellow. This is completely natural. As the plant grows, it sheds its oldest leaves. When this happens, I remove the yellowing leaf to prevent it from draining nutrients that could support new growth.
Regular observation is key. By checking leaves, roots, and spikes frequently, I can quickly notice any issues and respond before they become serious problems.
Caring for Other Houseplants
While orchids are my passion, I also grow other flowering plants. My African violets, for example, are currently covered in buds. They thrive with consistent care and bright, indirect light. If you notice white dust on violet leaves after treatment, it may be from pest control measures. Mealybugs often hide near the center of leaves and can stunt growth if left untreated.
I also enjoy propagating African violets. By placing a healthy leaf in water, roots soon begin to form. Once the roots are strong, I transfer the leaf cutting into a small pot, where it eventually develops into a new blooming plant.
My money tree is another favorite. It grows vigorously but prefers moderate watering. Too much water can cause problems, so I allow the soil to dry slightly between waterings.
A Simple Formula for Success
Healthy orchids are not the result of complicated techniques. They thrive with bright indirect light, seasonal temperature changes, balanced natural feeding, and careful watering. By paying attention to the roots and responding to the plant’s signals, it’s possible to enjoy repeated blooms throughout the year.
With patience and consistent care, orchids reward you generously—with strong roots, fresh spikes, and stunning flowers that brighten your home season after season.
Happy gardening, and may your orchids bloom beautifully!
