
Watermelons are a summer favorite, but growing large, juicy fruits at home can seem challenging—especially if you have limited space. Traditional gardening often requires large plots of land and frequent attention to watering. However, there’s a clever method that allows you to grow big, healthy watermelons even in small spaces: using recycled sacks combined with a simple bottle drip irrigation system. This technique maximizes space, saves water, and produces impressive fruits with minimal effort.
Why Grow Watermelons in Sacks?
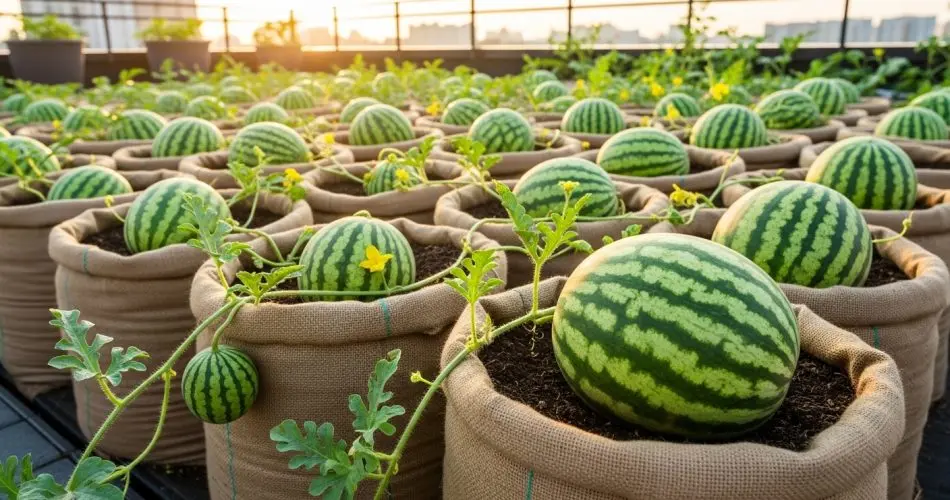
Recycled sacks provide an excellent growing medium for watermelons for several reasons:
- Space-saving: Ideal for balconies, patios, or small backyards.
- Controlled soil conditions: You can create the perfect soil mixture for optimal growth.
- Mobility: Sacks can be moved to take advantage of sunlight or protect against harsh weather.
- Eco-friendly: Reuses sacks that might otherwise be discarded.
When paired with a simple bottle drip irrigation system, this method ensures consistent watering while reducing waste, which is crucial for producing large, sweet fruits.
Materials You’ll Need
To start, gather the following items:
- Large recycled sacks (woven polypropylene sacks work best)
- High-quality potting soil or garden soil
- Compost or well-rotted manure
- Coco peat or coconut fiber (optional, for moisture retention)
- Watermelon seedlings or seeds
- Plastic bottles with a small hole drilled in the cap (for drip irrigation)
- Stakes or trellis for support if growing vertically
- Twine or soft ties
These materials are inexpensive and easy to source, making this method accessible for urban gardeners.
Preparing the Sacks
Begin by filling the recycled sacks with a nutrient-rich soil mix. A recommended mixture is:
- 50% garden soil
- 30% compost or organic manure
- 20% coco peat or coconut fiber
This combination ensures proper drainage while retaining enough moisture for the watermelon roots to thrive. Leave about 4–6 inches of space at the top of the sack to prevent overflow during watering.
If the sacks are placed vertically or on a balcony, ensure they are stable by placing them against a wall, railing, or supporting them with stakes. This prevents tipping as the plants grow larger and heavier.
Planting Watermelons
Watermelons can be grown from seeds or seedlings. For faster results, use young seedlings. Plant one seedling per sack, ensuring the roots are well-covered and the crown (where the leaves emerge) remains above the soil.
Position the sacks in a location that receives 6–8 hours of sunlight daily. Watermelons require full sun to develop sweet, juicy fruits and strong vines.
Setting Up Bottle Drip Irrigation
One of the most innovative parts of this method is using a simple bottle drip system to maintain consistent moisture:
- Take a plastic bottle and drill a small hole (1–2 mm) in the cap.
- Fill the bottle with water and insert it upside down into the soil near the plant base.
- Water will slowly drip through the hole, keeping the soil evenly moist over time.
This method reduces the risk of overwatering or underwatering, ensuring that watermelons develop large, juicy fruits. For best results, check the bottle daily and refill as needed. Multiple bottles can be used for larger sacks or multiple plants.
Supporting the Vines
Watermelon vines are heavy and spread quickly. To prevent damage and save space, train the vines to grow along a trellis, fence, or overhead support. Use soft twine or plant ties to gently secure vines, and ensure leaves and fruits are supported to prevent breakage. Vertical growth also improves air circulation and reduces the risk of disease.
Fertilizing for Big Fruits
Watermelons are heavy feeders and need regular nutrition. Fertilize every 2–3 weeks with a balanced liquid fertilizer or compost tea. Focus on fertilizers high in potassium and phosphorus, as these nutrients support flowering, fruit set, and fruit development. Avoid excessive nitrogen, which encourages leafy growth at the expense of fruit size.
Monitoring and Maintaining Plants
Regular maintenance is key to producing large watermelons:
- Check for pests such as aphids or beetles, and remove them manually or use organic sprays.
- Prune small or weak fruits to direct energy toward developing larger watermelons.
- Monitor soil moisture and adjust the drip system as necessary.
- Mulch around the base to retain moisture and prevent soil from drying out.
Harvesting Watermelons
Watermelons are typically ready to harvest 70–90 days after planting, depending on the variety. Signs of ripeness include a dull skin sheen, a yellow patch on the underside where the fruit touches the sack, and a hollow sound when tapped. Use a clean knife or scissors to cut the fruit from the vine, leaving a short stem attached to maintain freshness.
Advantages of This Method
This approach has numerous benefits:
- Space-efficient: Ideal for balconies, terraces, or small urban gardens.
- Consistent watering: Bottle drip irrigation ensures even moisture for optimal growth.
- Eco-friendly: Uses recycled sacks and bottles, reducing waste.
- Higher yield: Proper nutrition and vine management result in bigger, juicier fruits.
- Low maintenance: Minimal watering and careful nutrient management make it easy for beginners.
Final Tips
- Rotate the sacks periodically to ensure even sunlight exposure.
- Support fruits with a soft sling or netting if they become very heavy.
- Harvest at the right time for maximum sweetness and quality.
- Reuse the sacks and bottles for the next season to save resources.
Growing watermelons in recycled sacks with a bottle drip system is a practical, innovative, and rewarding method for home gardeners. With proper care, you can enjoy big, juicy watermelons even in limited spaces, transforming your balcony or small yard into a productive mini-farm.
