
Chili peppers bring heat, flavor, and vibrancy to countless dishes, from spicy sauces to stir-fries and pickles. Many gardeners assume they need a large outdoor garden to grow them successfully, but chilies actually adapt very well to container gardening. With just a few buckets, quality soil, and a sunny spot on your balcony, you can enjoy fresh chili harvests all season long.
Why Grow Chilies in Buckets?
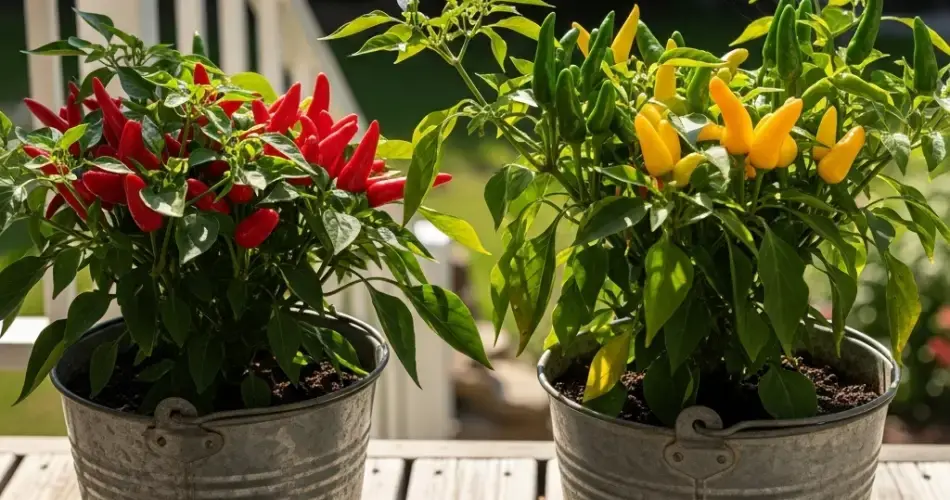
Buckets are a practical and affordable option for growing chili peppers, especially for those with limited space. A standard 5-gallon bucket provides plenty of room for a chili plant’s root system, ensuring it grows strong and productive. Containers also give you control over soil quality, watering, and fertilization, which helps prevent many common garden problems.
Another benefit of bucket gardening is portability. If your balcony receives uneven sunlight, you can easily move buckets around to maximize exposure. During heavy rains or intense winds, buckets can be shifted to shelter, protecting delicate chili plants from damage.
Choosing the Right Chili Varieties
Chilies come in many shapes, sizes, and heat levels, and most types can be grown in buckets. Compact varieties tend to do best in limited spaces, but even larger plants can thrive with proper care.
- Mild to Medium Varieties: Jalapeño, Anaheim, Poblano.
- Hot Varieties: Cayenne, Thai chili, Serrano.
- Extra-Hot Varieties: Habanero, Ghost Pepper, Carolina Reaper.
If you want frequent harvests, choose smaller-fruited chilies, as they often produce more peppers per plant. Dwarf or ornamental varieties are also great choices for balconies because they combine beauty with productivity.
Preparing Buckets for Planting
Before planting, make sure your containers are well-prepared:
- Drainage Holes – Drill several holes at the bottom of the bucket to prevent waterlogging. Chili roots cannot tolerate sitting in water.
- Soil Mix – Use a high-quality potting mix instead of regular garden soil. A good mix contains compost for nutrients, coco coir or peat for water retention, and perlite for drainage.
- Base Fertilizer – Mix in organic compost, slow-release fertilizer, or well-rotted manure before planting. Chilies are heavy feeders and need nutrient-rich soil to thrive.
- Placement – Position buckets in a sunny location, as chilies require at least six to eight hours of sunlight daily.
Planting Chili Seeds or Seedlings
You can grow chilies either from seeds or seedlings purchased at a nursery.
- From Seeds: Sow seeds about ¼ inch deep in seed trays or small pots. Once seedlings reach 4–6 inches tall and have strong roots, transplant one into each bucket.
- From Seedlings: If starting with nursery plants, place one healthy seedling per bucket, firm the soil gently, and water thoroughly.
Chilies prefer warm conditions, so plant them after the last frost and when temperatures consistently stay above 60°F (15°C).
Caring for Chilies in Buckets
- Watering – Chilies need consistent moisture, but avoid overwatering. Check the soil by sticking your finger an inch deep—if dry, it’s time to water. During hot weather, daily watering may be required.
- Feeding – Apply a balanced liquid fertilizer every two weeks while plants are young. Once flowers form, switch to a fertilizer higher in potassium to encourage fruiting.
- Support – Some chili plants, especially larger varieties, may require stakes or small cages to support heavy branches laden with peppers.
- Pruning – Pinch off early flowers if the plant is still small, encouraging it to focus on growing stronger roots and stems before producing fruit.
Common Problems and Solutions
- Yellowing Leaves: Often caused by overwatering or nutrient deficiency. Ensure proper drainage and regular feeding.
- Aphids and Whiteflies: These pests cluster on leaves and stems. Spray with neem oil or soapy water to control infestations.
- Spider Mites: Look for tiny webs on leaves. Increase humidity by misting plants and use insecticidal soap if needed.
- Blossom Drop: Hot weather or inconsistent watering can cause flowers to fall. Keep soil evenly moist and avoid stressing the plant.
Harvesting Balcony-Grown Chilies
Chilies can be harvested when they are fully grown and either green or fully ripened to red, yellow, or purple depending on the variety. Harvesting at the green stage gives a milder flavor, while fully ripened chilies are hotter and sweeter.
Use scissors or garden shears to cut chilies from the plant rather than pulling, which can damage branches. Regular harvesting encourages the plant to keep producing throughout the season.
Benefits of Growing Chilies in Buckets
- Space-Saving: Perfect for balconies, patios, and small gardens.
- Portability: Easy to move for optimal sun exposure and protection.
- Productive Plants: A single chili plant can yield dozens of peppers.
- Flavor Variety: From mild to fiery, you can grow a wide range of chilies in just a few containers.
Final Thoughts
Chili peppers are one of the easiest and most rewarding crops to grow in buckets. With the right variety, soil mix, and care, your balcony can become a mini chili farm, providing a continuous supply of fresh, flavorful peppers. Whether you enjoy mild spice or crave intense heat, container-grown chilies will give you a harvest tailored to your tastes—proving that even in small spaces, you can grow big flavors.
