
Chili peppers are a popular choice for home gardeners because they are flavorful, versatile, and surprisingly easy to grow in containers. Whether you prefer mild varieties for everyday cooking or fiery hot peppers to spice up your dishes, these plants adapt well to small pots and thrive on sunny balconies, patios, or windowsills. By providing the right conditions, you can enjoy a steady harvest of chilies even in limited spaces.
Why Grow Chilies in Pots?
Container gardening offers several advantages for chili plants. Pots allow you to control the quality of soil, water, and nutrients, which can be more challenging in garden beds. They also help prevent the spread of soil-borne diseases and make it easier to move plants to sunnier spots or protect them from harsh weather. For those living in apartments or homes without a garden, pots provide the opportunity to grow fresh chilies right at home.
Choosing the Right Pot
The size of the pot is one of the most important factors when growing chili peppers. While chili plants can survive in relatively small containers, a pot that is at least 10–12 inches deep and wide is ideal for most varieties. This allows enough space for the root system to develop and supports better overall plant health.
Make sure your pot has adequate drainage holes. Chilies dislike sitting in waterlogged soil, which can quickly lead to root rot. Clay or terracotta pots are excellent choices since they allow for better air circulation around the roots, though plastic containers can also work well if they are properly ventilated.
Selecting Chili Varieties
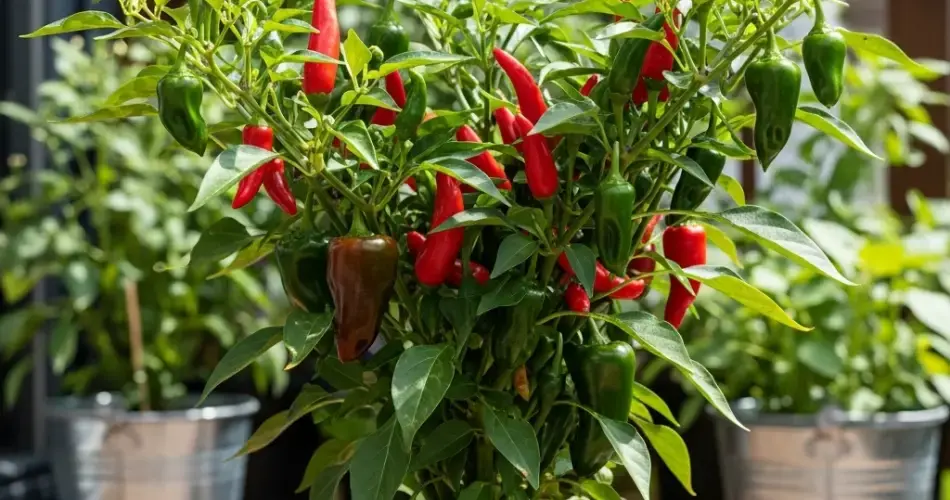
There is a wide range of chili varieties suitable for container growing, from compact ornamentals to productive fruiting plants. Some good options for small pots include:
- Cayenne – A classic variety that produces slender, medium-hot peppers.
- Thai Chili – Compact plants that produce clusters of fiery peppers.
- Jalapeño – Popular for their mild to medium heat and versatile use in cooking.
- Tabasco or Bird’s Eye Chili – Small, highly productive plants perfect for pots.
Choose varieties based on your heat preference and intended culinary use.
Preparing the Soil
Chilies thrive in light, well-draining soil rich in organic matter. A good mix for pots includes:
- 50% quality potting mix as the base
- 30% compost for fertility and organic matter
- 10% perlite or coarse sand to improve drainage
- 10% coconut coir or peat moss to retain moisture
This blend provides both nutrients and good aeration, helping roots grow strong. Adding a slow-release fertilizer at planting time gives your chili plants a healthy start.
Planting and Sunlight Needs
Chili peppers love warmth and sunshine. Place your pots in a location that receives at least 6–8 hours of direct sunlight daily. South-facing balconies, patios, or windowsills are usually the best spots.
When planting from seed, start them indoors 6–8 weeks before the last frost. Once seedlings are 4–6 inches tall and the weather is consistently warm, transplant them into pots. For seedlings bought at a nursery, simply transfer them into your prepared container, plant them at the same depth they were growing in, and water thoroughly.
Watering Requirements
Consistent watering is key to growing healthy chili plants. The soil should remain moist but never waterlogged. In small pots, soil dries out quickly, so check moisture levels daily, especially in hot weather. Water deeply until it drains from the bottom, ensuring that the entire root zone is hydrated.
Avoid letting the soil dry out completely, as this can stress the plant and reduce yields. However, overwatering can be equally harmful, so always balance moisture carefully.
Fertilizing for Growth and Fruit
Chilies are moderate feeders that benefit from regular fertilization. During the early growth stage, a fertilizer higher in nitrogen encourages leafy growth and strong stems. Once flowering begins, switch to a fertilizer with more phosphorus and potassium to support blooms and fruit production.
Organic options such as fish emulsion, compost tea, or seaweed extract are excellent for maintaining steady growth without overwhelming the plant. Feeding every 10–14 days during the growing season will help ensure consistent yields.
Supporting and Pruning
While many chili varieties stay compact, some may grow taller and require support. Small stakes or a lightweight cage can help keep the plant upright and prevent branches from snapping under the weight of peppers.
Pruning is also beneficial. Pinching off the first few flowers encourages the plant to put more energy into root and leaf growth, resulting in stronger plants that produce more fruit later. Regularly removing yellow or damaged leaves improves airflow and reduces the risk of disease.
Harvesting Chili Peppers
Chilies are usually ready for harvest 60–90 days after transplanting, depending on the variety. You can pick them when they are green for a milder flavor or allow them to ripen fully to red, orange, or yellow for more intense heat and sweetness.
Harvest regularly to encourage continuous production. Use scissors or garden shears to cut the peppers off rather than pulling them, which can damage the plant.
Final Thoughts
Caring for chili peppers in small pots is a rewarding and practical way to enjoy fresh, homegrown spice in your cooking. With the right pot size, nutrient-rich soil, consistent watering, and proper fertilization, even beginners can succeed in growing healthy chili plants. Whether you prefer mild jalapeños or fiery Thai chilies, container gardening makes it easy to have a steady supply right at your doorstep.
This simple, space-saving method proves that you don’t need a large garden to enjoy the thrill of harvesting your own chilies. A few pots and some attention to care are all it takes to keep your kitchen stocked with flavorful, homegrown heat.
