
A thriving home garden full of colorful bell peppers is a dream for any gardener, but keeping plants productive all season can be challenging. With the right approach, you can maintain a constant harvest, ensuring your kitchen is always stocked with fresh, sweet, and crunchy peppers. This method is simple, adaptable, and works whether you have a backyard, balcony, or even a small indoor space.
Why Grow Bell Peppers at Home
Bell peppers are not only visually appealing with their vibrant red, yellow, orange, and green colors, but they are also packed with nutrients. They are rich in vitamin C, vitamin A, antioxidants, and dietary fiber, making them a healthy addition to any meal. Growing them at home allows you to avoid pesticides, control soil and nutrients, and enjoy fresh produce whenever you want.
Homegrown peppers also taste far better than store-bought ones. Their flavors are sweeter, textures crisper, and harvests more rewarding because you know exactly how they were grown.
Preparing Your Plants
The first step in a successful bell pepper garden is selecting healthy seedlings or seeds. Choose varieties suited to your climate—some perform better in warm conditions, while others tolerate cooler temperatures. Popular options include sweet bell peppers, mini bell peppers, and mixed-color varieties.
If starting from seeds, sow them in seed trays or small pots filled with a light, nutrient-rich potting mix. Keep the soil moist but not soggy, and place the seedlings in a warm, sunny spot or under grow lights. Germination usually takes 7–14 days, depending on the variety.
Once seedlings reach 8–10 cm in height and have several true leaves, they are ready to be transplanted into larger pots or garden beds.
Soil and Container Preparation
Bell peppers thrive in well-drained soil rich in organic matter. If using pots or containers, ensure each has drainage holes to prevent waterlogging. Mix compost or organic fertilizer into the soil to provide essential nutrients for strong growth and abundant fruiting.
For indoor or balcony setups, you can use recycled containers, grow bags, or hydroponic systems. The key is giving roots enough space to spread while maintaining moisture and nutrient availability.
Planting and Spacing
Plant bell peppers deeply, covering the roots and part of the stem. Space plants 30–45 cm apart to allow airflow and reduce the risk of fungal diseases. Proper spacing also ensures each plant receives adequate sunlight, which is crucial for flower and fruit development.
Watering and Nutrient Care
Bell peppers need consistent moisture but do not tolerate soggy soil. Water the plants regularly, ensuring the soil is damp but well-drained. Mulching around the base helps retain moisture and keeps the roots cool.
Feed your peppers with a balanced liquid or granular fertilizer every 2–3 weeks. A fertilizer high in potassium promotes flowering and fruiting, while nitrogen supports leaf growth. Using organic options like compost tea, fish emulsion, or seaweed extract can improve soil health and increase yields naturally.
Encouraging Continuous Fruiting
The secret to keeping your bell pepper garden productive is encouraging ongoing flowering and fruiting. Here’s how:
- Pruning: Remove yellow or damaged leaves and pinch off early flowers if plants are small. This redirects energy to root development and stronger stems.
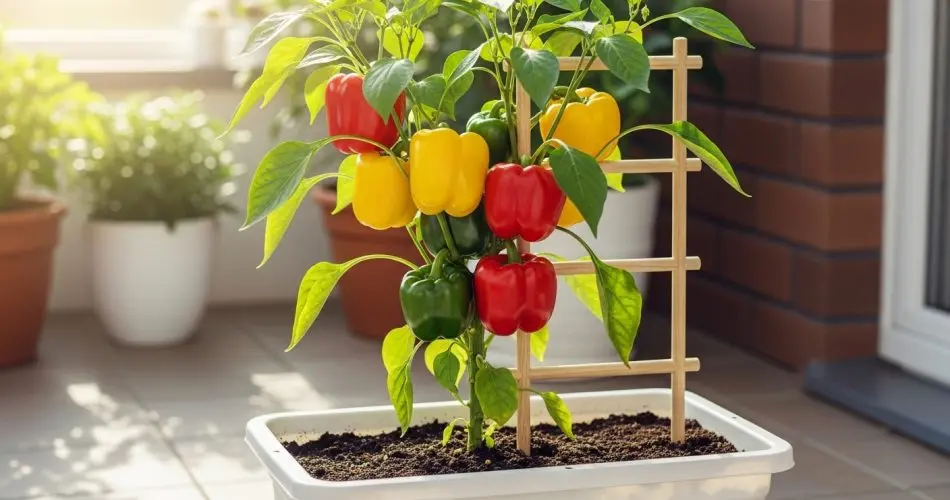
- Support: Use stakes or cages to prevent branches from breaking under the weight of fruit.
- Pollination: If growing indoors, gently shake flowers or use a soft brush to transfer pollen. Outdoors, bees and wind handle pollination naturally.
- Temperature control: Bell peppers prefer 21–27°C during the day and 15–18°C at night. Avoid extreme heat or cold, which can halt flowering.
Pest and Disease Management
Regular monitoring is essential to prevent pests and diseases. Common problems include aphids, whiteflies, and fungal infections. Spray with natural remedies like neem oil or insecticidal soap and remove infected leaves immediately. Maintaining clean pots, good spacing, and proper airflow reduces the likelihood of infestations.
Harvesting Bell Peppers
Bell peppers can be harvested at various stages depending on your preference. Green peppers are unripe but still nutritious, while fully ripened red, yellow, or orange peppers are sweeter and richer in vitamins. Use a sharp knife or scissors to cut peppers, leaving a short stem attached to the plant. Regular harvesting encourages new flowers and continuous fruiting.
Benefits of a Home Bell Pepper Garden
- Constant supply of fresh produce: Your kitchen will always have peppers ready for salads, stir-fries, and sauces.
- Nutrient-rich food: Homegrown peppers are free from chemical residues.
- Space-efficient: Can be grown in pots, containers, or vertical setups.
- Cost-effective: Saves money compared to buying peppers from the store, especially premium varieties.
- Sustainable and rewarding: Reusing containers, composting, and nurturing plants creates a sustainable and fulfilling hobby.
Final Tips for Success
- Rotate your pots occasionally for even sunlight exposure.
- Avoid over-fertilizing, which can lead to leafy growth but fewer fruits.
- Keep an eye on watering—bell peppers dislike both drought and waterlogged soil.
- Experiment with companion planting, such as basil or marigolds, to improve growth and reduce pests naturally.
Conclusion
A bell pepper garden at home doesn’t have to be complicated. With the right care, attention, and setup, your plants can produce vibrant, healthy fruits continuously throughout the season. Whether you grow them on a balcony, in containers, or in a small garden plot, this method ensures your home will always be full of delicious bell peppers.
By following these steps, you not only enjoy fresh, nutritious produce but also create a sustainable, rewarding gardening practice. Start today, and watch your bell pepper plants flourish and bear fruit season after season.
