
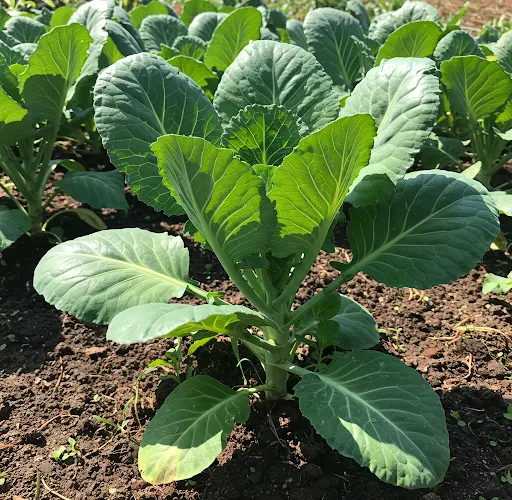
Collard greens are one of the most nutritious leafy vegetables you can grow at home. Rich in vitamins A, C, and K, as well as fiber and minerals, they are a fantastic addition to any diet. However, not everyone has the luxury of a large backyard garden or the time to tend to a high-maintenance vegetable patch. The good news is that growing collard greens in big plastic containers is an easy, space-saving, and nearly hassle-free solution that can provide fresh greens for your family year-round. Even better, with the right setup, you can significantly reduce or even eliminate the need for constant watering.
If you had known about this simple growing method earlier, you could have saved money, time, and effort while enjoying a continuous supply of healthy greens. Here’s everything you need to know about growing collard greens in containers with minimal maintenance.
Why Grow Collard Greens in Big Plastic Containers?
Growing collard greens in containers offers several advantages over traditional in-ground gardening:
- No Backyard Required: Perfect for apartment dwellers, urban gardeners, or those with limited space.
- Minimal Watering: With self-watering techniques, you can reduce water usage significantly.
- Pest and Disease Control: Containers reduce the risk of soil-borne pests and diseases.
- Portable and Convenient: Move your plants to catch the best sunlight or protect them from extreme weather.
- Year-Round Harvesting: Grow collard greens indoors or on a balcony, even in winter.
- Less Weeding, Less Work: No need to deal with invasive weeds or soil-borne problems.
Step-by-Step Guide to Growing Collard Greens in Plastic Containers
1. Choose the Right Container
Big plastic containers, such as 10-20 gallon tubs, storage bins, or repurposed barrels, are ideal for growing collard greens. These large containers allow plenty of room for roots to grow while retaining enough moisture to reduce watering needs.
Key Features to Look For:
- At least 12-18 inches deep for proper root growth.
- Wide enough to allow multiple plants to grow.
- Drainage holes at the bottom to prevent waterlogging.
Pro Tip: Use self-watering containers or create a wicking system to keep moisture levels stable without constant watering.
2. Preparing the Container
Once you have your plastic container, prepare it properly for planting:
- Drill several drainage holes at the bottom to allow excess water to escape.
- Place a layer of gravel or small stones at the bottom to improve drainage.
- Fill with a high-quality, well-draining potting mix rich in organic matter.
For a self-watering setup, insert a perforated plastic tube or water reservoir at the bottom before adding soil. This allows water to wick up from the bottom as needed, reducing the need for frequent watering.
3. Selecting and Planting Seeds or Seedlings
You can start collard greens from seeds or buy seedlings from a local nursery.
- If starting from seeds, plant them 1/4 to 1/2 inch deep and space them about 6 inches apart.
- If using seedlings, transplant them at the same depth as they were growing in their nursery pots.
For a continuous harvest, consider planting a few seeds every couple of weeks to ensure a steady supply of greens.
4. Providing Optimal Growing Conditions
Collard greens thrive in cool temperatures, making them an excellent fall and winter crop. However, they can also grow in mild summer climates with adequate shade.
- Sunlight: Place the containers in a spot that gets at least 4-6 hours of sunlight daily. If indoors, use grow lights for supplemental lighting.
- Temperature: Ideal growing temperatures range between 45-75°F (7-24°C).
- Soil pH: Slightly acidic to neutral soil (pH 6.0-7.5) is best.
5. Watering and Moisture Management
With a self-watering container, you’ll only need to refill the water reservoir every few days. If using a standard plastic container:
- Keep the soil consistently moist but not soggy.
- Water deeply every few days instead of light daily watering to encourage strong root growth.
- Mulch the surface with straw or compost to retain moisture and reduce evaporation.
6. Natural Fertilization
To keep collard greens healthy and productive:
- Use organic compost or worm castings as a natural fertilizer.
- Apply liquid fish emulsion or seaweed extract every 2-3 weeks for a nutrient boost.
- Avoid synthetic fertilizers that can lead to excessive leaf growth with poor flavor.
7. Controlling Pests and Diseases
Container gardening already reduces many pest issues, but a few common pests may still show up.
- Aphids and Cabbage Worms: Spray with neem oil or a homemade garlic spray.
- Fungal Diseases: Ensure proper air circulation by spacing plants adequately.
- Slugs and Snails: Use crushed eggshells or diatomaceous earth around the base of the plants.
8. Harvesting Your Collard Greens
Collard greens can be harvested continuously, making them an excellent long-term food source.
- Begin harvesting outer leaves when they are large enough (about 8-10 inches long), leaving the inner leaves to continue growing.
- Regular harvesting encourages more leaf production.
- If you want a full harvest, cut the entire plant at the base, but leaving some stems can encourage regrowth.
How This Method Saves You Money and Effort
Growing collard greens in big plastic containers not only provides fresh food for your family but also cuts down on grocery expenses. Here’s how:
- No Expensive Gardening Equipment Needed: You can use repurposed plastic bins instead of buying raised beds or garden plots.
- Lower Water Bills: The self-watering method significantly reduces water consumption.
- Eliminates Cost of Store-Bought Greens: A single container can provide months of fresh, organic collard greens.
- Reduces Pest Control Costs: Container gardening minimizes the need for expensive pesticides.
- Saves Time: No weeding, no constant watering, and minimal maintenance.
Final Thoughts
If you had known about this hassle-free method of growing collard greens earlier, you could have saved both time and money. Now, with just a big plastic container, some soil, and a little effort, you can enjoy a continuous harvest of fresh, nutritious greens for your family—all without the need for a traditional garden. Try this method today, and you’ll never need to buy store-bought collard greens again!
