
Growing sweet potatoes at home is one of the most rewarding and productive gardening experiences. These nutritious root vegetables are easy to cultivate, require minimal maintenance, and thrive in warm climates. With a little patience and proper care, even beginners can grow a plentiful harvest in a backyard garden, raised bed, or even large containers.
Sweet potatoes are not only delicious but also packed with essential nutrients such as fiber, vitamin A, vitamin C, and potassium. Unlike many other vegetables, they grow from “slips,” which are sprouts that emerge from a mature sweet potato. This unique propagation method makes them both fascinating and economical to grow.
Starting with Sweet Potato Slips
The first step in growing sweet potatoes is producing slips. You can easily create these sprouts using a healthy sweet potato from your kitchen.
Choose a firm, disease-free sweet potato and place it in a jar or glass with half of it submerged in water. Toothpicks can be used to hold the potato in place on the rim of the container. Place the jar in a warm, sunny location such as a windowsill.
Within two to four weeks, small shoots will begin to grow from the potato. These shoots are called slips. Once they reach about 5 to 6 inches in length, gently twist them off the potato and place them in a separate container of water. After a few days, roots will begin to form at the base of each slip.
When the slips have developed strong roots, they are ready to be planted in the garden.
Preparing the Soil
Sweet potatoes prefer loose, well-drained soil. The soil should be rich in organic matter and slightly sandy if possible, as this allows the roots to expand easily underground.
Before planting, loosen the soil to a depth of about 12 inches and remove any rocks or debris that could hinder root growth. Mixing compost or well-rotted manure into the soil will greatly improve fertility and structure.
Sweet potatoes thrive in warm conditions, so it is best to plant them after the last frost when soil temperatures reach at least 65°F (18°C). Warm soil encourages faster growth and healthy root development.
Planting the Slips
To plant the slips, create small holes or shallow trenches about 3 to 4 inches deep. Space the plants about 12 to 18 inches apart, with rows spaced roughly 3 feet apart.
Insert each slip into the soil so that the roots and lower portion of the stem are buried, while the leaves remain above the surface. Firm the soil gently around the plant and water thoroughly.
During the first week, regular watering helps the slips establish themselves in the soil.
Watering and Care
Sweet potatoes are relatively drought-tolerant once established, but consistent watering is important during the early stages of growth. Keep the soil evenly moist but not waterlogged.
A deep watering once or twice a week is usually sufficient, depending on the climate and soil type. Overwatering can cause root rot or reduce the quality of the tubers.
Mulching around the plants with straw, dry leaves, or grass clippings helps retain soil moisture, regulate temperature, and suppress weeds.
Sweet potato plants produce long vines that spread across the ground. These vines create a natural ground cover, which helps shade the soil and prevent weed growth.
Fertilizing the Plants
Sweet potatoes do not require heavy fertilization. In fact, excessive nitrogen can cause the plants to produce more vines and fewer tubers.
Using organic compost at planting time usually provides enough nutrients for the plants. If needed, a balanced organic fertilizer can be applied midway through the growing season to support healthy root development.
Managing Pests and Diseases
Sweet potatoes are generally hardy plants with relatively few pest problems. However, common garden pests such as aphids, beetles, and caterpillars may occasionally appear.
Regularly inspecting the plants helps detect problems early. Natural solutions like neem oil, insecticidal soap, or introducing beneficial insects can help keep pests under control.
Good garden hygiene, proper spacing, and well-drained soil also reduce the risk of fungal diseases.
Harvesting Sweet Potatoes
Sweet potatoes typically take 90 to 120 days to mature, depending on the variety and growing conditions.
The plants will signal that harvest time is approaching when the leaves begin to yellow and the vines slow their growth. Carefully dig around the base of the plant with a garden fork or shovel to avoid damaging the tubers.
Lift the sweet potatoes gently from the soil and shake off excess dirt. Handle them carefully because freshly harvested sweet potatoes are delicate and easily bruised.
Curing for Better Flavor
After harvesting, sweet potatoes benefit from a curing process. Curing helps heal minor cuts and improves the flavor and sweetness of the tubers.
Place the harvested sweet potatoes in a warm, humid environment for about 7 to 10 days. Ideal conditions are around 80–85°F (27–29°C) with good ventilation.
Once cured, they can be stored in a cool, dry place for several months.
Growing Sweet Potatoes in Containers
If you do not have a large garden space, sweet potatoes can also be grown successfully in containers or grow bags.
Choose a container that holds at least 15 to 20 gallons of soil. Fill it with a loose, well-draining potting mix enriched with compost. Plant one or two slips per container and allow the vines to trail over the edges.
Container-grown sweet potatoes require slightly more frequent watering, but they can still produce a generous harvest.
A Rewarding Home Garden Crop
Growing sweet potatoes at home is both simple and satisfying. With minimal equipment and basic gardening care, you can transform a single sweet potato into a productive crop that feeds your family.
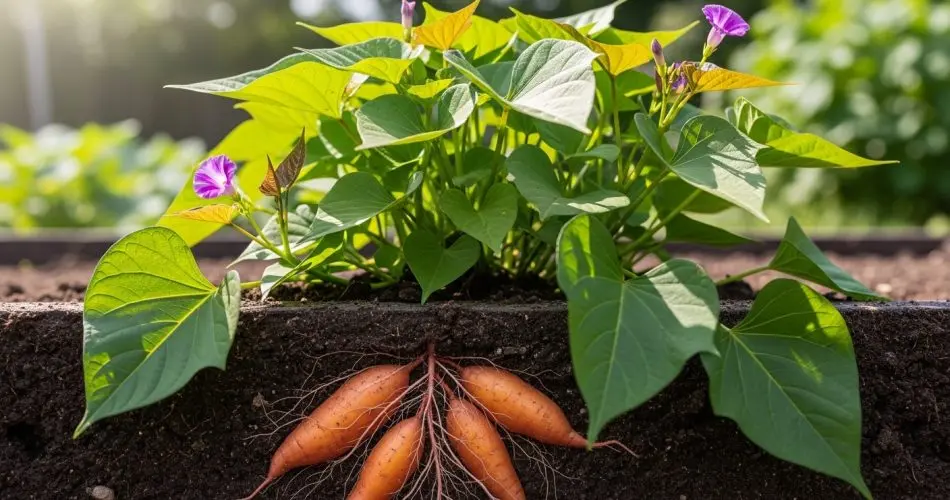
From sprouting slips in a jar to harvesting golden tubers from the soil, the process is enjoyable from start to finish. Whether planted in a backyard garden or a simple container, sweet potatoes offer gardeners a delicious reward for their efforts.
