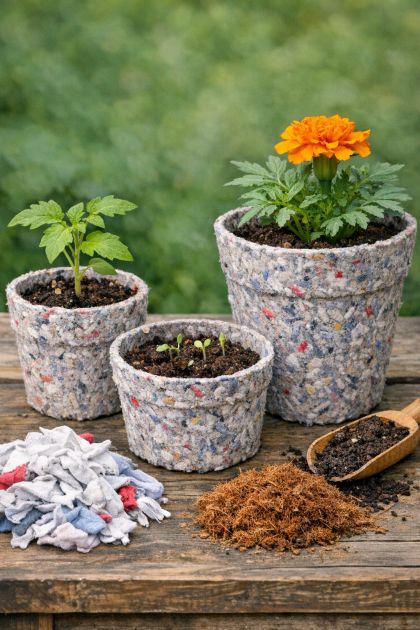
This DIY project is all about creating biodegradable planting pots using everyday materials like old cotton t-shirts, which not only helps reduce waste but also provides an eco-friendly planting solution. These pots are perfect for starting seedlings or small plants, and they naturally decompose, enriching the soil. This is particularly useful for gardeners looking to start their plants indoors before transplanting them outside as the season warms up. The biodegradable nature of these pots eliminates the need to disturb the roots during transplanting, thus promoting healthier plant growth.
These DIY biodegradable planting pots seamlessly integrate into various garden styles, from rustic cottage gardens to sleek modern setups. They are suitable for starting a variety of plants, including herbs like basil and cilantro, flowers such as marigolds and petunias, or even small vegetable seedlings like tomatoes and peppers. Place them in containers or raised beds for easy access and maintenance. The colorful shredded t-shirts add a touch of whimsy and color, making them visually appealing when arranged in rows or clusters.
Biodegradable Cotton T-Shirt Planting Pots
Materials
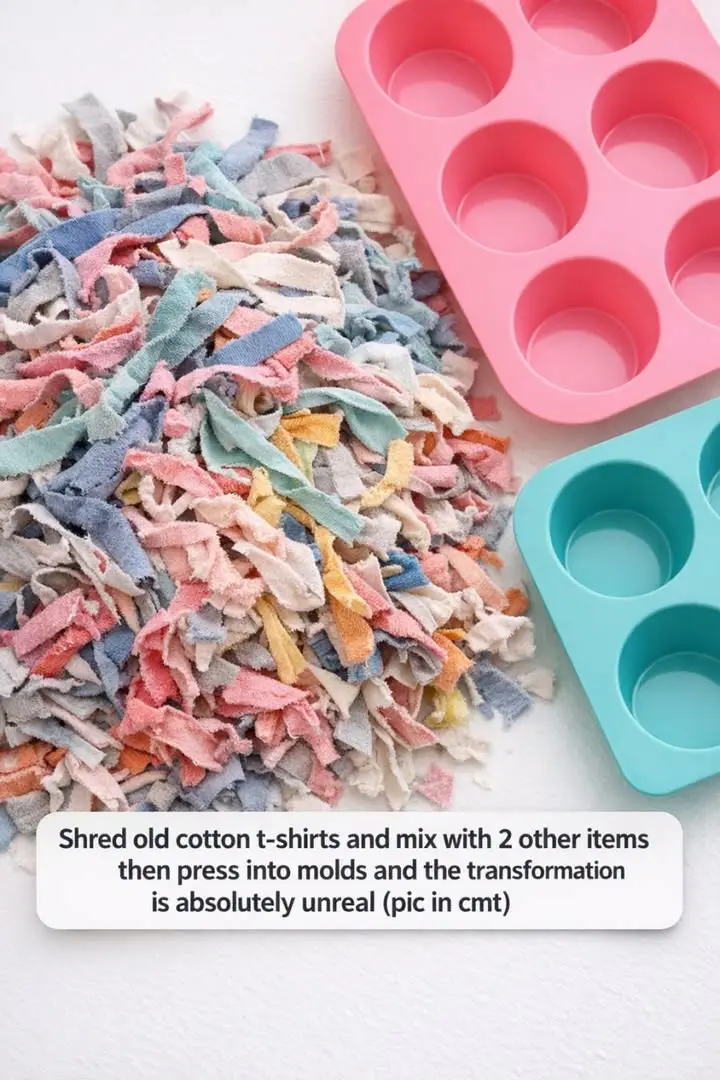
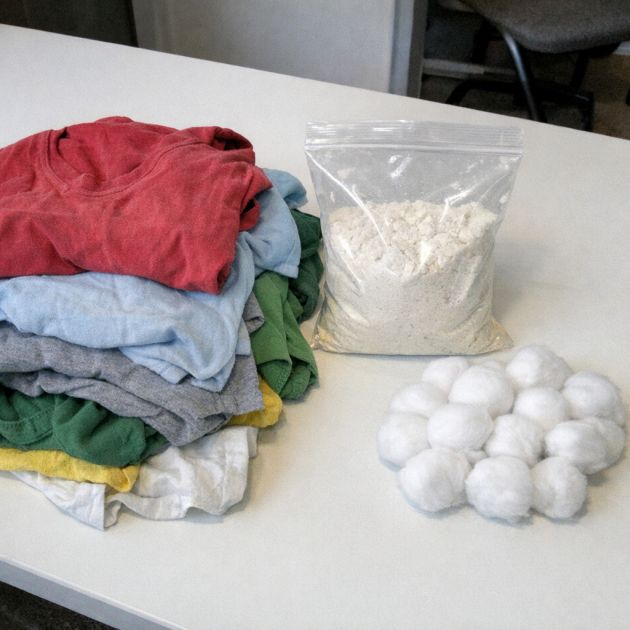
Old cotton t-shirts (preferably colorful) – 2 to 3 shirts
All-purpose flour – 1 cup
Water – 1 cup
Silicone muffin molds – as many as needed
Directions
1. Begin by cutting the old cotton t-shirts into strips approximately 1 inch wide. Continue to shred these strips into smaller pieces until you have a pile of shredded fabric.
2. In a mixing bowl, combine 1 cup of all-purpose flour with 1 cup of water to create a thick paste. Stir until the mixture is smooth and free of lumps.
3. Gradually add the shredded cotton pieces into the paste, mixing thoroughly to ensure each piece is well-coated with the paste.
4. Take the silicone muffin molds and fill each cavity with the paste-coated fabric, pressing down firmly to ensure it holds its shape.
5. Allow the molds to dry completely, which may take 24-48 hours depending on humidity. The drying process can be hastened by placing them in a warm, dry area or using a fan.
6. Once fully dry, gently remove the biodegradable pots from the silicone molds. They should hold their shape and be ready for planting.
Variations & Tips
For variations, consider using different natural fibers like linen or hemp for more texture. You could also add natural dyes to the paste for a uniform color or use organic flour for an entirely eco-friendly approach. Adapt the pot sizes by using larger or smaller molds to suit different plant types. In colder climates, consider using thicker fabric layers for added insulation to protect seedlings during early spring. For wetter climates, ensure the drying process is thorough to prevent mold. These adaptations allow for tailored solutions that meet specific gardening needs and environmental conditions.
