If you’re looking for a unique way to add color and personality to your patio without spending a fortune, this DIY project is worth trying. By combining inexpensive river rocks, outdoor paint, and a durable rubber mat, you can create a one-of-a-kind decorative rug that instantly becomes a conversation piece.
Unlike traditional outdoor rugs that can fade or wear out after a season, a rock mat is sturdy, weather-resistant, and completely customizable. Whether you prefer bright colors, earthy tones, or artistic patterns, this project lets you create something that perfectly matches your outdoor space.
Here’s everything you need to know to make your own painted river rock patio mat.
Why This DIY Is Becoming So Popular
Homeowners love this idea because it transforms ordinary landscaping stones into functional outdoor art.
Some of its biggest advantages include:
- Creates a colorful focal point for patios and porches.
- Uses inexpensive materials available at most garden centers.
- Can be customized with endless color combinations.
- Holds up well outdoors when properly sealed.
- Adds texture and personality to any seating area.
- Makes a fun weekend project for the entire family.
Materials You’ll Need
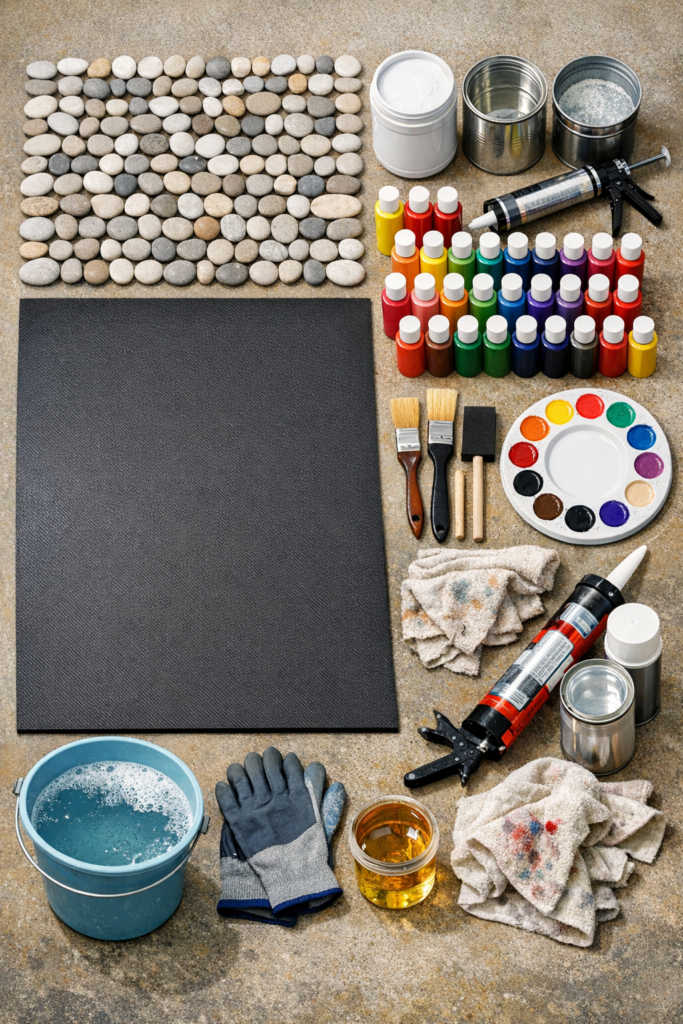
Gather everything before you begin.
Supplies
- 250–350 smooth flat river rocks (depending on size)
- One heavy-duty rubber outdoor mat
- Outdoor acrylic paint or masonry paint
- Paintbrushes in several sizes
- Paint pens (optional for detailed designs)
- Exterior-grade construction adhesive
- Clear outdoor polyurethane or stone sealer
- Mild soap
- Bucket of water
- Soft scrub brush
- Old towels
- Disposable gloves
- Plastic drop cloth
Step 1: Choose the Right Rocks
Look for stones that are:
Look for stones that are:
- smooth
- relatively flat
- similar in thickness
- comfortable to step on
The flatter the stones, the more comfortable the finished mat will be.
Step 2: Wash Every Rock
River rocks usually contain:
- dust
- clay
- algae
- dirt
Wash them thoroughly using warm water and mild soap.
Scrub each stone before rinsing.
Allow them to dry completely.
Paint sticks much better to clean surfaces.
Step 3: Plan Your Color Palette
Before opening the paint, decide on your overall design.
Popular themes include:
Rainbow
Bright reds, yellows, blues, greens, oranges, and purples.
Coastal
White, turquoise, navy, and sandy beige.
Earthy
Brown, gray, olive green, and cream.
Modern
Black, white, gold, and silver.
Step 4: Prime the Stones (Optional)
If your rocks are dark, applying a white primer first helps bright colors appear more vibrant.
Allow the primer to dry according to the manufacturer’s instructions.
Step 5: Paint the Base Colors
Apply two thin coats rather than one thick coat.
Allow each layer to dry completely before adding another.
Thin coats produce a smoother finish and reduce chipping.
Step 6: Add Decorative Designs
Now comes the fun part.
Decorate the rocks using:
- stripes
- dots
- flowers
- spirals
- hearts
- geometric shapes
- mandalas
- abstract art
Mix large and small patterns to create visual interest.
No two stones need to look exactly alike.
Step 7: Let Everything Dry
Allow the painted rocks to dry for at least 24 hours.
Avoid stacking them during this time.
Step 8: Seal the Paint
Apply two to three coats of a clear outdoor sealer.
This helps:
- prevent fading
- resist moisture
- reduce paint chipping
- protect against UV rays
Let each coat dry completely before applying the next.
Step 9: Arrange the Layout
Place the rubber mat on a flat surface.
Before gluing anything, experiment with different arrangements.
Try to:
- spread colors evenly
- mix large and small stones
- eliminate large empty spaces
Take a photo once you’re happy with the design.
This makes reassembly easier.
Step 10: Glue the Stones to the Mat
Working one section at a time:
- Lift one rock.
- Apply a generous amount of exterior construction adhesive.
- Press it firmly back into place.
- Continue until every stone is attached.
Leave a small gap between stones so the mat remains slightly flexible.
Step 11: Let the Adhesive Cure
Place the finished mat somewhere dry.
Allow the adhesive to cure for 24 to 48 hours, or follow the manufacturer’s recommendations.
Avoid moving the mat during this time.
Step 12: Place Your Finished Rock Mat
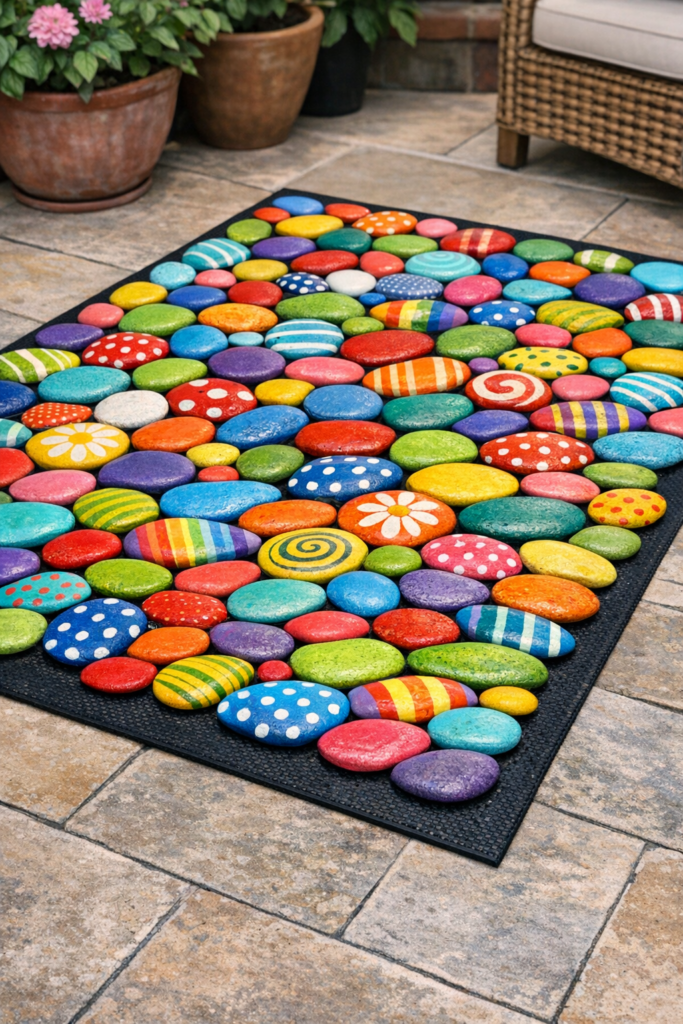
Your decorative mat is now ready to use.
Perfect locations include:
- front porch
- patio entrance
- outdoor seating area
- garden path
- greenhouse entrance
- balcony
- poolside
Tips for Long-Lasting Results
To keep your mat looking beautiful for years:
- Sweep away dirt regularly.
- Rinse with a garden hose when needed.
- Avoid dragging heavy furniture across it.
- Reapply outdoor sealer every year or two if exposed to intense sunlight.
- Store it in a covered area during harsh winters if possible.
Creative Variations
Once you’ve mastered the basic project, try customizing it even further.
Ideas include:
Nature Theme
Paint leaves, bees, butterflies, mushrooms, and flowers.
Beach Style
Use shades of blue with seashell-inspired designs.
Holiday Decor
Create interchangeable mats for:
- Christmas
- Halloween
- Easter
- Fourth of July
- Autumn
Personalized Entry Mat
Paint your family initials or house number onto several larger stones.
Glow-in-the-Dark Design
Use outdoor glow paint on selected rocks for a magical nighttime effect.
Frequently Asked Questions
Will the rocks come loose?
Not if you use a high-quality exterior construction adhesive and allow it to cure fully before use.
Can the mat stay outside year-round?
Yes. With proper sealing and weather-resistant adhesive, it can withstand rain, sun, and normal outdoor conditions. In areas with freezing winters, storing it under cover can help extend its lifespan.
Is it comfortable to walk on?
Yes, as long as you choose smooth, flat river rocks and arrange them evenly.
How many rocks do I actually need?
A standard 24 x 36-inch rubber mat typically requires between 250 and 350 medium-sized flat stones, depending on their size and spacing.
Final Thoughts
This colorful river rock mat is proof that simple materials can become extraordinary with a little creativity. By painting smooth stones in vibrant colors and arranging them on a sturdy rubber mat, you can create an outdoor accessory that’s both practical and eye-catching. Whether placed on a patio, porch, or garden path, this DIY project adds charm, texture, and personality to your outdoor living space.
The best part is that no two mats will ever be exactly alike, making your finished creation a truly unique piece of functional garden art that friends, family, and neighbors are sure to admire.
