
There’s something magical about a softly lit garden path at dusk. The warm glow of candlelight, the gentle flicker dancing across flowers and stone, and the welcoming atmosphere it creates can transform an ordinary yard into something straight out of a storybook. That’s exactly what happened when one creative homeowner decided to hang simple mason jars from shepherd hooks lining her garden walkway.
What began as a budget-friendly weekend project quickly became the most admired feature in the neighborhood. Friends, family, and neighbors couldn’t stop asking how she created such an enchanting nighttime display. The secret? A handful of mason jars, a few shepherd hooks, and a little creativity.
This easy DIY project combines rustic farmhouse charm with practical outdoor lighting, creating a pathway that feels warm, inviting, and surprisingly elegant.
Why This DIY Walkway Lighting Idea Is So Popular
Traditional landscape lighting can be expensive. Professional installations often cost hundreds or even thousands of dollars. Mason jar lanterns offer a charming alternative that delivers beautiful results for a fraction of the price.
Homeowners love this project because it:
- Adds instant curb appeal
- Creates a cozy nighttime atmosphere
- Uses inexpensive materials
- Works in gardens of any size
- Can be customized for every season
- Requires very little maintenance
The rustic glass jars perfectly complement cottage gardens, farmhouse landscapes, modern rustic homes, and even traditional yards.
The Finished Look
Imagine walking down a garden path as the sun begins to set. Along both sides of the walkway, mason jars hang gracefully from black shepherd hooks. Inside each jar, a warm glowing candle flickers softly, illuminating nearby flowers and casting beautiful shadows on the path.
The effect is subtle yet stunning.
Instead of harsh bright lights, the lanterns provide a soft ambient glow that feels welcoming and peaceful. Guests immediately notice the display, and many assume it was professionally designed.
Materials You’ll Need
One of the best things about this project is its simplicity.
Supplies
| Material | Quantity |
|---|---|
| Mason jars | 6–12 |
| Shepherd hooks | 6–12 |
| Jute twine or wire | 1 roll |
| LED tea lights or candles | 6–12 |
| Decorative stones or sand | Optional |
| Wire cutters | 1 |
| Scissors | 1 |
| Outdoor sealant (optional) | As needed |
The total cost typically ranges between $30 and $80 depending on the number of lanterns.
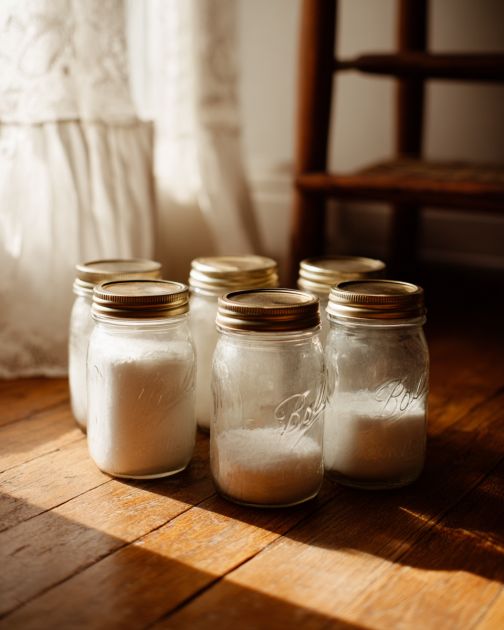
Step 1: Gather and Clean the Mason Jars
Begin by thoroughly cleaning all mason jars.
Remove:
- Labels
- Sticky residue
- Dust
- Dirt
Clean glass allows the candlelight to shine more brightly and creates a polished finished appearance.
If you’re using recycled jars, inspect them for cracks or chips before proceeding.
Step 2: Create Hanging Handles
The jars need a secure method for hanging from the shepherd hooks.
Option 1: Twine Handles
Wrap sturdy jute twine around the neck of each jar several times.
Tie securely and create a loop above the lid.
Option 2: Wire Handles
Using craft wire:
- Wrap wire around the jar neck.
- Twist tightly.
- Form a sturdy carrying handle.
Wire tends to last longer outdoors, while twine offers a softer rustic appearance.
Step 3: Add Decorative Fillers
Step 3: Add Decorative Fillers
Although optional, fillers enhance the overall look.
Popular choices include:
- White pebbles
- River rocks
- Sand
- Glass gems
- Shells
- Decorative gravel
Place a small layer in the bottom of each jar.
This helps stabilize candles and adds visual interest during daylight hours.
Step 4: Insert the Lighting
For safety and convenience, battery-operated LED tea lights are highly recommended.
Benefits include:
- No fire risk
- Weather resistance
- Longer lifespan
- Automatic timers available
Simply place one LED candle inside each mason jar.
If you prefer real candles, use only in sheltered locations and never leave them unattended.
Step 5: Position the Shepherd Hooks
Now it’s time to plan the layout.
Space shepherd hooks evenly along the walkway.
A typical arrangement places hooks:
- 4 to 6 feet apart
- Alternating on both sides of the path
Step back occasionally to ensure the spacing looks balanced and natural.
The gentle rhythm of repeating lanterns creates the dramatic visual effect.
Step 6: Install the Hooks Securely
Push each shepherd hook firmly into the ground.
Ensure:
- They stand upright
- They are evenly aligned
- They feel stable
For loose soil, press them deeper for extra support.
Proper installation prevents lanterns from swaying excessively during windy conditions.
Step 7: Hang the Mason Jar Lanterns
Carefully hang each jar from its hook.
Adjust the hanging loops so all lanterns sit at a similar height.
The jars should appear balanced and evenly distributed throughout the walkway.
Take your time with this step because small adjustments make a big difference in the final appearance.
Step 8: Test the Lighting at Dusk
Wait until evening and switch on the candles.
This is the perfect time to evaluate:
- Brightness levels
- Spacing
- Height adjustments
- Overall visual impact
Move hooks if necessary until the lighting feels balanced along the entire pathway.
Step 9: Add Landscaping Around the Lanterns
The lanterns look even more beautiful when surrounded by plants.
Excellent companions include:
Flowers
- Lavender
- Petunias
- Coneflowers
- Roses
Foliage
- Hostas
- Ferns
- Ornamental grasses
Ground Covers
- Creeping thyme
- Moss
- Sweet alyssum
The combination of plants and glowing lanterns creates a magical garden atmosphere.
Step 10: Enjoy Your New Evening Walkway

Once completed, your path becomes more than just a route to the front door.
It becomes a feature.
The warm glow invites visitors, enhances curb appeal, and creates a relaxing environment for evening strolls.
You’ll likely find yourself spending more time outdoors simply to enjoy the ambiance.
Creative Variations to Try
One reason this project has become so popular is its flexibility.
Fairy Light Jars
Replace candles with battery-operated fairy lights for extra sparkle.
Seasonal Themes
Decorate jars with:
Spring
- Fresh flowers
- Pastel ribbons
Summer
- Seashells
- Beach glass
Fall
- Mini pumpkins
- Pinecones
Winter
- Faux snow
- Evergreen sprigs
Colored Glass
Tint jars with transparent glass paint for unique lighting effects.
Common Mistakes to Avoid
Many DIYers make a few simple errors.
Avoid:
- Uneven hook spacing
- Weak hanging handles
- Using jars with cracks
- Overcrowding the walkway
- Choosing excessively bright lights
- Installing hooks too shallowly
Attention to detail creates a more professional-looking result.
Budget Breakdown
| Item | Estimated Cost |
|---|---|
| Mason jars | $10–$20 |
| Shepherd hooks | $15–$40 |
| LED tea lights | $10–$20 |
| Decorative fillers | $5–$15 |
Total Project Cost: Approximately $40–$80
Comparable landscape lighting systems often cost several hundred dollars.
Why Everyone Loves This Idea
This project succeeds because it combines simplicity with elegance. The materials are humble, but the effect is extraordinary. During the day, the mason jars add rustic charm to the garden. At night, they transform into glowing lanterns that guide visitors along the path with a warm, welcoming light.
The soft illumination creates a peaceful atmosphere that feels far more expensive than it actually is. It’s easy to see why neighbors often stop to admire the display and ask how it was made.
Final Reveal: A Storybook Garden Path
As darkness settles over the garden, the mason jars begin to glow one by one. Suspended from elegant shepherd hooks, they line the walkway like tiny beacons of warmth and charm. The flickering lights reflect off the glass, illuminate nearby flowers, and guide visitors down the path with a gentle golden glow.
What started as a few simple jars and garden hooks has become a breathtaking landscape feature that looks like it belongs in a magazine. Affordable, easy to build, and endlessly customizable, this DIY mason jar lantern walkway proves that sometimes the most beautiful outdoor décor ideas come from the simplest materials.
