
Orchids are delicate plants, and when they start to rot, it can be discouraging for any gardener. However, even when an orchid has lost all its leaves and only the stem and roots remain, it is still possible to revive it. Instead of discarding a seemingly lifeless orchid, you can restore its health using natural remedies like garlic and ginger. Additionally, egg shells provide an excellent organic fertilizer to promote flower growth. This guide will show you step by step how to save a rotten orchid and encourage it to bloom again.
Step 1: Assess the Orchid’s Condition
When an orchid shows signs of decay, carefully inspect its roots and stem. Remove all wilted and rotten leaves to prevent further damage. Similarly, trim off any broken or dead roots, keeping only the fresh, healthy ones. If there are any old flower stalks, cut them off to allow the plant to focus on new growth. Rinse the remaining plant with clean water to remove any debris.
Step 2: Seal the Cut Ends
To prevent water from seeping into the fresh cuts and causing further rot, apply a melted candle solution to the trimmed areas. This will create a protective barrier that helps the plant retain moisture while healing.
Step 3: Prepare a Garlic Solution
Garlic has antifungal and antibacterial properties, making it an excellent natural remedy for preventing diseases and stimulating new root growth.
- Take 3 cloves of garlic and mince them finely.
- Soak the minced garlic in 1 liter of water at room temperature.
- Let the solution sit for one day in a cool place.
- After 24 hours, strain the liquid to remove the garlic residue.
Step 4: Soak the Orchid in Garlic Water
Soaking the orchid in the prepared garlic water for about 20 minutes will help eliminate bacteria and fungi, ensuring the plant remains healthy. The remaining garlic solution can also be sprayed on other orchids to prevent pests and diseases.
Step 5: Replant the Orchid
After soaking, plant the orchid in a well-draining medium such as pine bark or dry pumice stones. These materials help retain moisture without causing the roots to rot. Place the orchid in a cool, shaded area for one week without watering it.
Step 6: Provide Ideal Growing Conditions
After one week, begin watering the orchid lightly to keep the roots moist. Maintain a temperature between 20-25°C and avoid direct sunlight. Regularly mist the plant to provide sufficient humidity. Covering it with a clear, vented plastic container can help create a controlled environment, promoting faster recovery.
Step 7: Use Ginger Juice as a Growth Booster
After two weeks, introduce an organic fertilizer made from ginger extract. Ginger juice is known for its ability to stimulate plant growth and strengthen the roots.
- Mix 3ml of ginger extract with 1 liter of water.
- Water the orchid with this solution every 10 days.
- Continue placing the plant in a shaded area with adequate humidity.
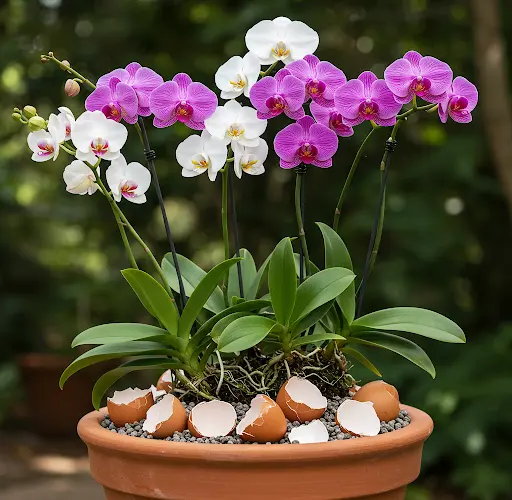
Step 8: Introduce Egg Shells as Fertilizer for Blooming
Egg shells are an excellent natural fertilizer rich in calcium and minerals that support flower production.
- Collect and clean egg shells to remove any residue.
- Crush them into small pieces or grind them into powder.
- Sprinkle the egg shell powder onto the soil around the orchid’s roots.
- Alternatively, soak the crushed egg shells in water for 24 hours and use the nutrient-rich liquid to water the orchid once every two weeks.
Step 9: Observe Growth Progress
After one month, the orchid should show signs of improvement, with new roots developing. Continue using organic fertilizers such as garlic, ginger, and egg shells to ensure steady growth and vibrant blooms. With proper care, your orchid will not only recover but also produce beautiful flowers once again.
By following these natural methods, you can revive even the most damaged orchids and enjoy healthy, long-lasting blooms.
