
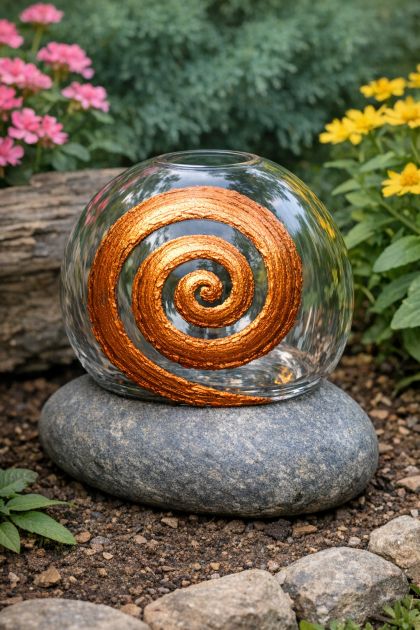
At first glance, this piece looks like something you’d find in a high-end garden boutique. A smooth river rock base, a perfectly balanced glass sphere, and inside it—a mesmerizing copper spiral that catches the light beautifully. But here’s the twist: this stunning outdoor décor is actually a simple DIY project that anyone can recreate at home.
This viral backyard hack is exploding online because it combines minimal cost, easy steps, and a luxury look. If you’re looking to upgrade your garden, patio, or balcony without spending a fortune, this project might be exactly what you need.
Why This DIY Is So Popular
People love this idea for a few simple reasons:
- It looks like designer garden art
- It uses affordable, easy-to-find materials
- It’s beginner-friendly
- It instantly elevates outdoor spaces
The contrast between natural stone, clear glass, and metallic copper creates a modern yet organic aesthetic that works in almost any garden style.
Affiliate Disclaimer
This article contains affiliate links, which means I may earn a small commission if you purchase through them, at no extra cost to you. I only recommend products that are relevant and useful for this project. Your support helps keep this content free and allows me to continue creating helpful guides. Thank you!
What You’ll Need (Materials List)
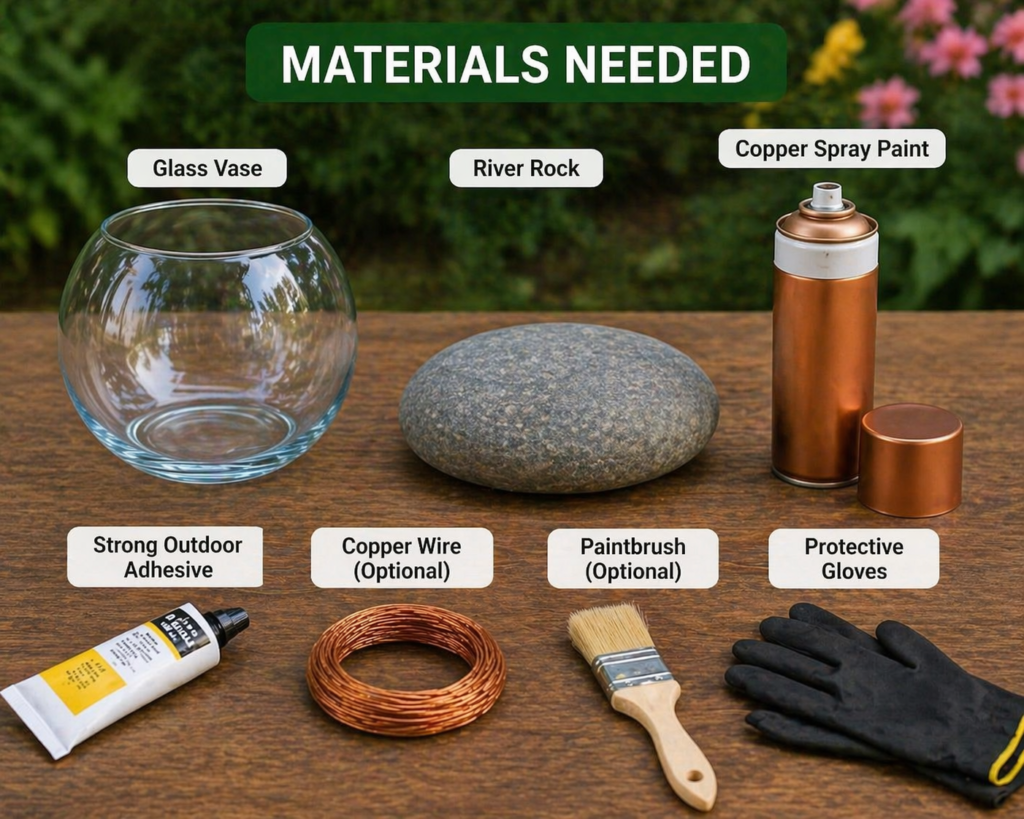
Here’s everything required to recreate this look:
- A round or oval glass vase or bowl
- A smooth river rock (flat and stable)
- Strong outdoor adhesive or epoxy glue
- Copper spray paint or metallic acrylic paint
- Paintbrush (if using acrylic paint)
- Optional: copper wire or textured material for the spiral design
- Protective gloves and newspaper for your workspace
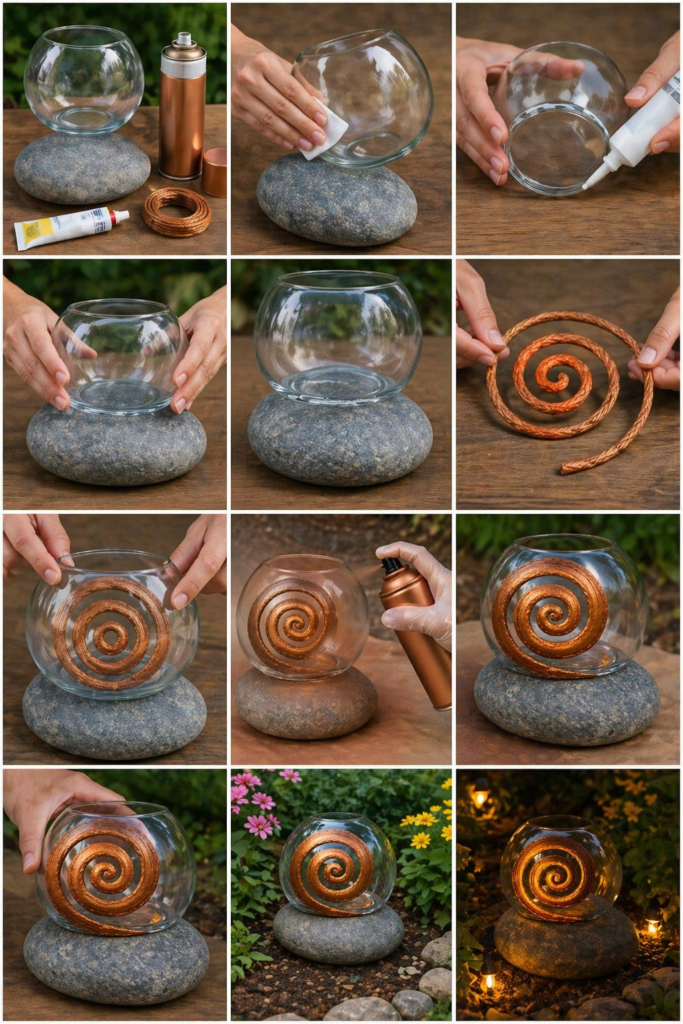
Step-by-Step Guide
Step 1: Choose the Right Rock and Vase
Step-by-Step Guide
Step 1: Choose the Right Rock and Vase
Pick a sturdy, flat-bottomed river rock that can support the vase. The glass vase should sit securely on top without wobbling.
Step 2: Clean All Surfaces
Wash and dry both the rock and the vase thoroughly. Any dust or moisture can weaken the glue bond.
Step 3: Glue the Vase to the Rock
Apply a strong layer of outdoor adhesive to the base of the vase and press it firmly onto the rock. Hold it in place for a few minutes, then let it cure according to the glue instructions (usually 24 hours).
Step 4: Create the Copper Spiral Design
Inside the vase, you can:
- Paint a spiral directly onto the glass
- Or place a coiled material (like rope or wire) and paint it
Let your creativity guide you—the spiral is what gives this piece its artistic flair.
Step 5: Paint the Design
Use copper spray paint for a smooth, reflective look, or brush on metallic paint for more texture. Apply multiple light coats for the best result.
Let it dry completely between layers.
Step 6: Final Touches
Once everything is dry:
- Clean the glass for a polished look
- Place your piece in a garden bed, patio, or near plants
- Optionally add small lights nearby to enhance the reflection
Pro Tips for a Professional Finish
- Use weather-resistant paint to prevent fading
- Choose a heavier rock for stability outdoors
- Apply a clear sealant for extra durability
- Experiment with different shapes and sizes
Where to Place It in Your Garden
This decorative piece works beautifully in:
- Flower beds
- Zen gardens
- Patio corners
- Entryways
- Around water features
Its reflective surface and metallic glow make it especially eye-catching during sunrise and sunset.
Why This Hack Works So Well
This DIY succeeds because it blends three powerful design elements:
- Nature (stone)
- Transparency (glass)
- Luxury (copper finish)
The result feels both calming and sophisticated—something that usually costs much more in stores.
Final Thoughts
This viral backyard hack proves that you don’t need expensive materials to create something truly beautiful. With just a few simple steps, you can transform everyday items into a stunning piece of garden art that looks professionally made.
Whether you’re decorating your outdoor space or just looking for a fun creative project, this idea is worth trying. And once you see the final result in your garden, you’ll understand exactly why everyone is talking about it.
