
Growing your own sweet potatoes is a highly rewarding project, but the work does not end when you pull them out of the ground. Before you can eat or store them, sweet potatoes must go through a vital process called curing. If you skip this step, your harvest will not taste very sweet, and the potatoes will likely spoil or rot within a few short weeks.
Curing is a straightforward process that you can easily do at home with everyday items.
Why is Curing Necessary?
Curing is an essential step that changes both the outside and the inside of the sweet potato. Here is exactly why this process must be done before storage:
- Heals Harvest Wounds: When you dig up sweet potatoes, they often get scratched, scraped, or nicked by garden tools. Curing helps the potato grow a second layer of skin over these cuts. This seals the potato, stopping bacteria from getting inside and causing rot.
- Develops Sweet Flavor: Freshly dug sweet potatoes are quite starchy and lack flavor. The curing period triggers a potent internal change, converting those heavy starches into natural sugars. This chemical shift is exactly what gives the sweet potato its famous, rich, sweet taste.
- Toughens the Skin: Fresh sweet potatoes have a very thin, delicate outer skin that can rub off easily. The curing process thickens and hardens this outer layer, creating a durable shield to protect the inside of the vegetable.
- Increases Storage Life: Because the wounds are completely healed and the outer skin is toughened, properly cured sweet potatoes can be stored safely for many months without shriveling or going bad.
The Ideal Conditions for Curing
To cure correctly, sweet potatoes need to sit in an environment that mimics the hot, humid climates where they naturally grow. To make this happen at home, you need to provide four specific conditions:
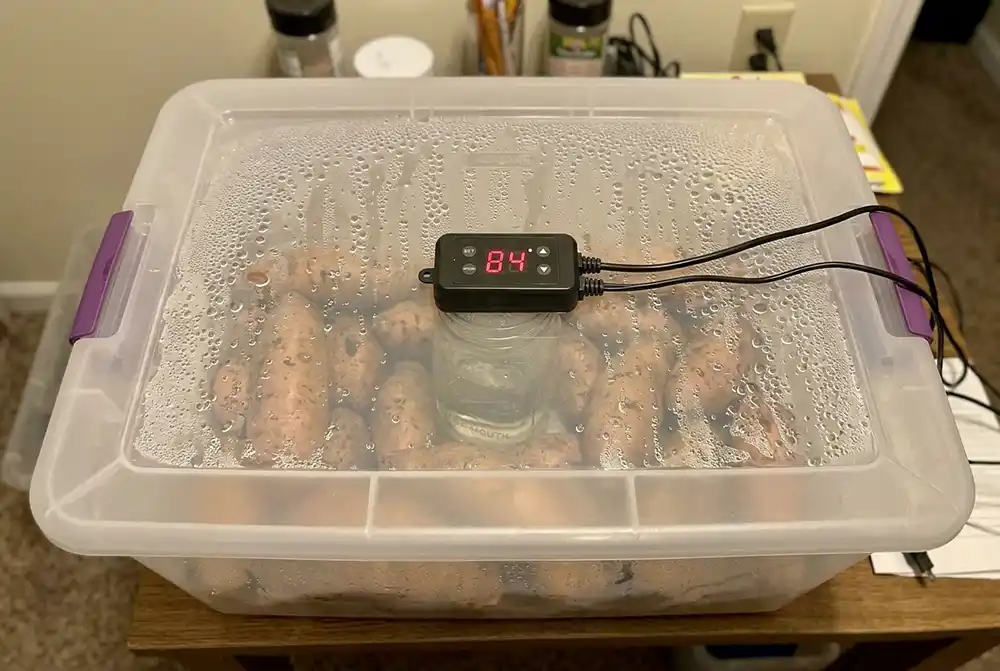
- High Temperature: The space needs to stay warm, ideally between 80 and 85 degrees Fahrenheit.
- High Humidity: The moisture in the air must be very high, around 85 to 90 percent.
- Good Airflow: While they need heat and moisture, they also need to breathe. Without a small amount of fresh air, they will begin to mold.
- Proper Time: They need to stay in these exact conditions for anywhere from 5 to 10 days.
Homemade Ways to Cure Sweet Potatoes
Creating a hot, damp environment in a normal, air-conditioned house might sound difficult, but you can easily set up a curing station using basic household supplies. Here are three homemade methods, depending on the size of your harvest:
Method 1: The Plastic Grocery Bag (Best for a small harvest)
- Do not wash the sweet potatoes. Gently brush off the loose dirt with your hands or a dry cloth.
- Place a few sweet potatoes into a standard plastic grocery bag.
- Punch several small holes all around the bag so air can flow in and out.
- Tie the handles of the bag loosely.
- Place the bag in the warmest spot in your house. A sunny windowsill or on the floor near a heating vent works well. The sweet potatoes will naturally release their own moisture as they sit, creating a humid micro-climate inside the bag.
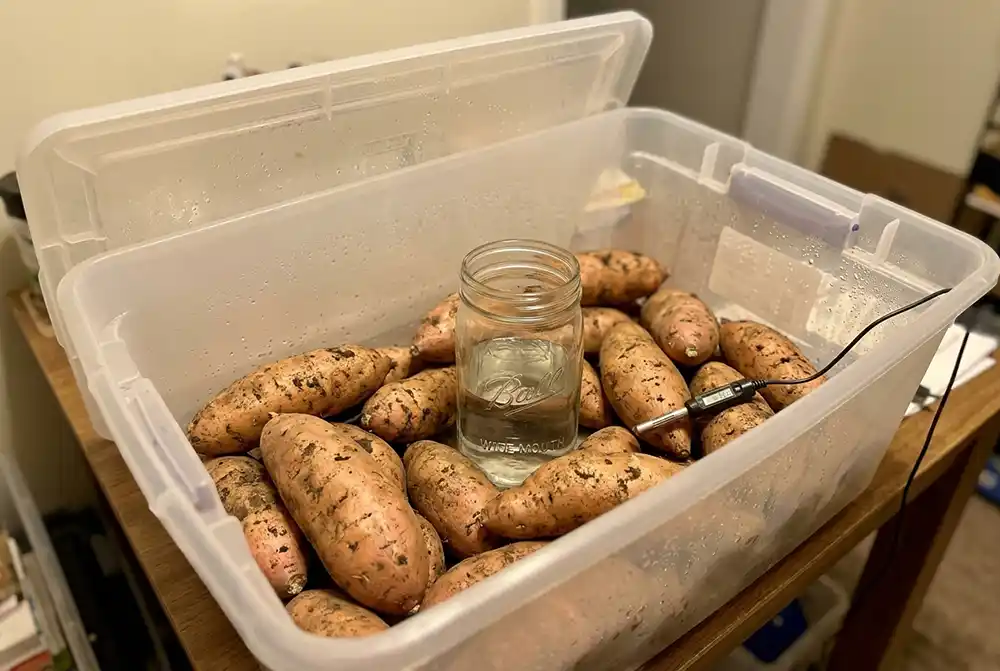
Method 2: The Plastic Storage Tote (Best for a medium harvest)
- Get a large plastic storage box or tote. Drill or cut several holes in the sides and lid for ventilation.
- Lay the unwashed sweet potatoes loosely inside the box. Do not pack them too tightly; they need space between them.
- Place a clean, damp towel or a wet sponge in the corner of the box. Make sure the damp cloth does not directly touch any of the potatoes. This will provide the necessary high humidity.
- Put the lid on the storage box.
- Place the box in a warm room, near a space heater, or on top of a warm appliance like a refrigerator. Check the towel every day to ensure it stays damp.
Method 3: The Small Room Setup (Best for a large harvest)
- Choose a small, enclosed space in your home, such as a spare bathroom, a walk-in closet, or a small pantry.
- Place your unwashed sweet potatoes into wooden crates or cardboard boxes that have plenty of holes punched in the sides.
- Put a small electric space heater in the room. Set the thermostat to keep the room’s temperature right around 80 to 85 degrees Fahrenheit.
- Place a small humidifier in the room. If you do not have a humidifier, set a few wide, shallow pans of water directly in front of the space heater. The heat will evaporate the water and fill the small room with humidity.
- Leave the door open just a crack, or run a small fan on the lowest setting pointing away from the potatoes to keep the air gently circulating.
What to Do After Curing is Complete
After 5 to 10 days, check your sweet potatoes. If the skin feels firm to the touch and any scratches look completely dried and sealed over, the curing process is finished.
- Prepare for Storage: Carefully move the sweet potatoes into clean cardboard boxes, milk crates, or paper bags.
- Find a Cool Spot: Move the boxes to a dark, dry place that stays around 55 to 60 degrees Fahrenheit. A basement, a cool closet, or a pantry floor is usually perfect.
- Never Refrigerate: Do not ever put sweet potatoes in the refrigerator. The cold temperature will permanently ruin their internal texture, making the centers hard and completely changing their natural flavor.
When stored properly after a good homemade curing process, your sweet potatoes will stay fresh, sweet, and ready to eat for up to six months.
