If you’ve never made your own pickles before, you’re about to discover just how easy (and fun) it can be.
You don’t need fancy tools, rare ingredients, or complicated steps — just a few basic items, some patience, and a little bit of kitchen curiosity.
Let’s walk through the exact method step-by-step so you can turn fresh cucumbers into crisp, garlicky, tangy brine pickles — the kind you’ll want to snack on straight from the jar.
Why Brine Pickles?
Brine pickles are different from vinegar-based pickles. Instead of pouring vinegar over your cucumbers, you let them naturally ferment in salty water.
This process encourages beneficial bacteria to develop, giving your pickles that classic deli tang and a satisfying crunch.
Benefits of making brine pickles at home:
- No artificial preservatives — you’re in control of the ingredients.
- Better flavor — fresh herbs, garlic, and spices infuse over several days.
- Probiotic-rich — natural fermentation can be good for your gut.
What You’ll Need
Before you start, gather everything in one place.
Here’s your short shopping and prep list:
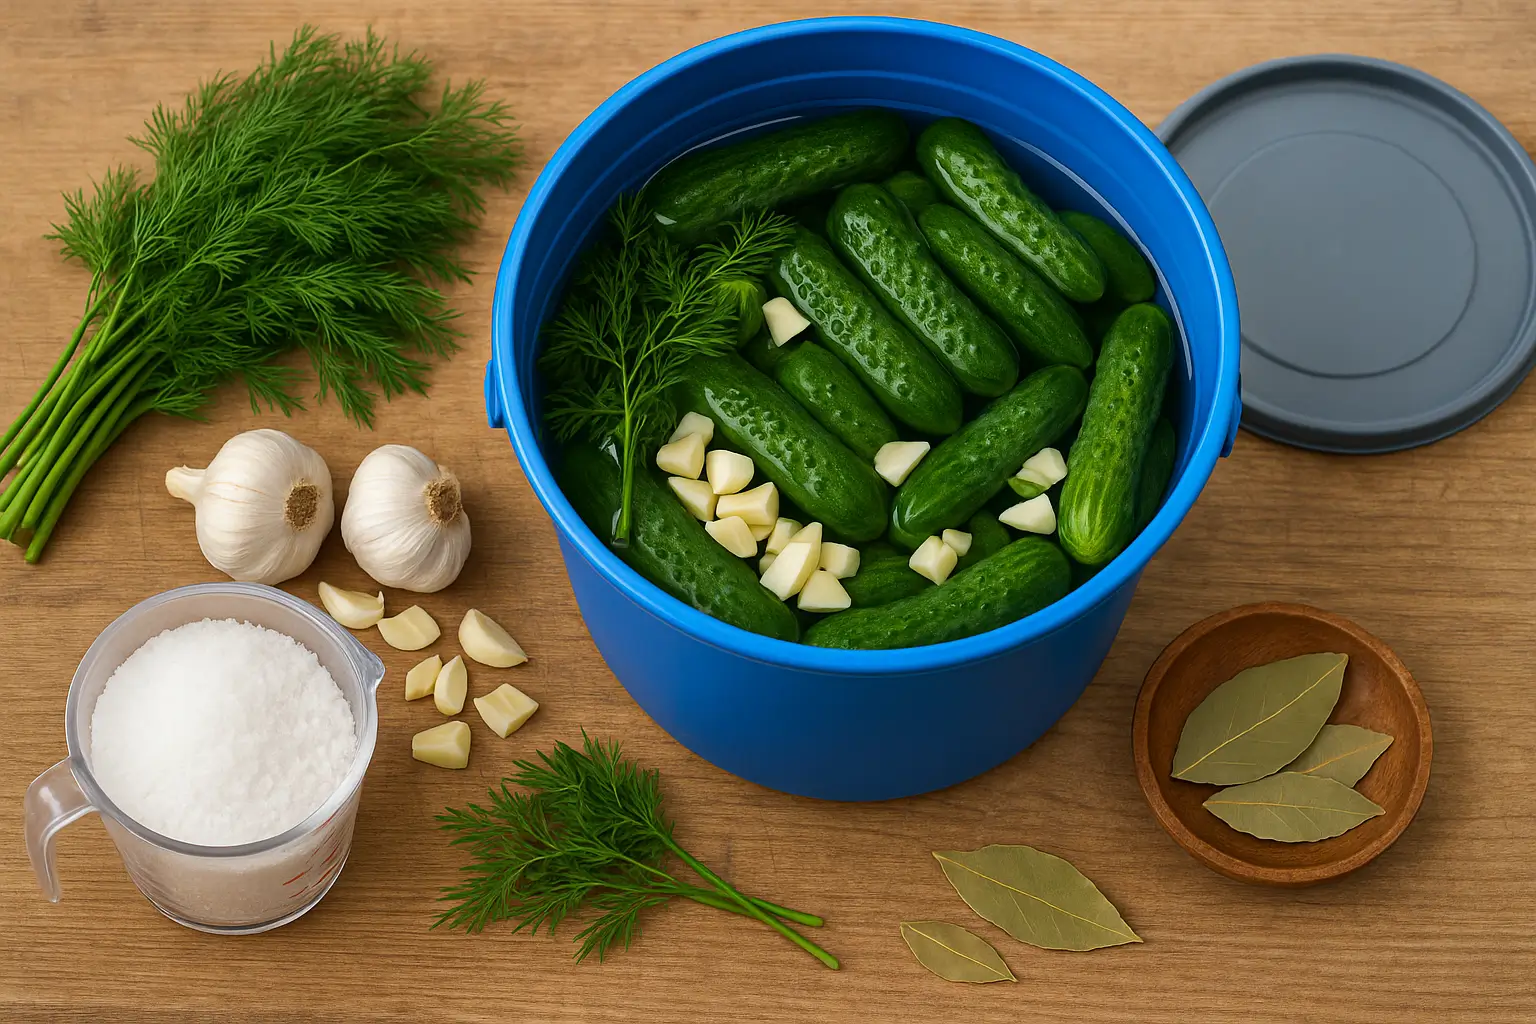
- A clean 2- or 3-gallon plastic bucket with a lid (or any food-safe container — a big jar, ceramic crock, or large Tupperware works fine)
- 1 gallon of water
- 1 cup of canning salt (also called pickling salt — don’t use table salt, it can make the brine cloudy)
- 2 to 3 pounds of small pickling cucumbers (the smaller, the crunchier)
- A bunch of fresh dill (stems and all — more flavor!)
- 2 whole bulbs of garlic (not just cloves — bulbs)
- 2–3 bay leaves
- A small plate or clean weight (to keep cucumbers submerged)
Step 1: Make Your Brine
Start by filling your container with 1 gallon of water and 1 cup of canning salt.
Stir until the salt dissolves completely.
This saltwater mix is the magic potion that preserves your cucumbers and gives them that signature pickle flavor.
Step 2: Prep Your Cucumbers
Wash your cucumbers thoroughly to remove any dirt.
If they’ve been sitting for a while, give them a quick soak in cold water for 30 minutes — this helps keep them crisp.
You can keep them whole, cut them in half, or even into spears — but remember, smaller pieces will ferment faster.
Step 3: Build the Flavor Base
Now for the fun part — layering in your aromatics.
- Toss your cucumbers into the brine.
- Add your bunch of fresh dill right on top.
- Smash your garlic cloves from the 2 bulbs, then roughly chop them before tossing them in.
- Drop in two or three bay leaves for a subtle, earthy undertone.
Step 4: Keep Them Under the Brine
Fermentation works best when everything stays under the surface of the liquid.
Place a small plate (or a clean, food-safe weight) over the cucumbers to keep them from floating up.
This step is crucial — anything that sticks out of the brine can develop mold.
Step 5: Cover and Wait
Pop the lid on your container, but don’t screw it on too tightly — gases will build up during fermentation, and you don’t want to trap them completely.
Leave your bucket at room temperature for 5 to 7 days.
The longer they sit, the tangier they’ll become.
You can start tasting around day 4 to see if the flavor is where you want it.
Step 6: Enjoy Your Pickles
Once they’ve reached the perfect flavor, transfer them to the fridge to slow down fermentation.
Now they’re ready to eat — right from the container if you like.
Serve them as a snack, chop them into salads, or add them to sandwiches for a crunchy kick.
Extra Tips for Success
Here are a few small tricks to make sure your pickles come out perfect every time:
- Pick the right cucumbers — small, firm pickling cucumbers work best. Avoid soft or overripe ones.
- Mind your salt — too little and they may spoil; too much and they’ll be unpleasantly salty.
- Watch the temperature — too warm and they’ll ferment too fast; too cold and it’ll slow things down.
- Check daily — skim off any foam that forms on the surface. This is normal and doesn’t mean they’ve gone bad.
A Family Tradition That Works Anywhere
This method comes from an old-fashioned kitchen where food wasn’t rushed and flavors had time to develop.
Traditionally, people used ceramic crocks, but you can use just about any clean, food-safe container.
The charm of this recipe is that it’s flexible — you can add peppercorns, mustard seeds, or even chili flakes if you want a little heat.
Why You’ll Want to Make These Again (and Again)
Once you taste your first batch, you’ll realize store-bought pickles just don’t compare.
The freshness, the aroma, the way the garlic and dill blend with the cucumber — it’s irresistible.
Plus, the process itself is oddly satisfying.
There’s something rewarding about making a simple, traditional food with your own hands.
Ready to Start Pickling?
Now you have everything you need to create your own delicious batch of brine pickles.
Grab your bucket, gather your ingredients, and get started today.
Your taste buds will thank you — and your friends might start dropping hints for a jar of their own.
Call to Action:
If you found this guide helpful, share it with someone who loves homemade food as much as you do.
Better yet, try the recipe and tell us how your pickles turned out — your feedback could inspire even more people to start their own brine-pickling adventure
