Orchids are renowned for their beauty, elegance, and long-lasting blooms. However, getting them to rebloom can seem tricky for many orchid enthusiasts. With the right care and attention, your orchid can bloom not just once, but multiple times, giving you year-round enjoyment. Here’s a detailed guide on how to get your orchid to bloom again and again.
1. Understanding Orchid Growth Cycles
Before diving into specific tips, it’s essential to understand the natural growth cycle of orchids. Like many plants, orchids go through periods of active growth (when they produce leaves and roots), followed by dormancy, and then bloom again. Patience is key — orchids need time to rest between blooming periods.
- Active Growth Phase: Orchids produce new roots and leaves.
- Dormancy Phase: After blooming, the orchid rests and gathers energy.
- Blooming Phase: With proper care, new flower spikes emerge and the orchid blooms.
2. Choose the Right Orchid Type
The most common orchid variety found in homes is the Phalaenopsis, also known as the moth orchid. It’s known for its ease of care and the ability to rebloom, making it a perfect choice for beginners. Other orchid varieties may have different care requirements, so ensure you know what kind of orchid you have.
3. Light: A Crucial Element
Orchids need the right amount of light to encourage blooming. While they don’t tolerate direct sunlight (it can burn their leaves), they do need bright, indirect light to thrive.
- Ideal Light: Place your orchid in a bright room where it can get filtered sunlight, such as near an east or south-facing window.
- Leaf Color Indicator: The color of the leaves can indicate if your orchid is getting enough light. Healthy orchids have light green leaves. Dark green leaves indicate too little light, while yellowish leaves may mean too much direct sun.
4. Temperature Control: Mimic Their Natural Habitat
Orchids bloom best when they experience slight temperature fluctuations, especially between day and night. In nature, orchids often experience cooler nights and warm days, which signals to the plant that it’s time to bloom.
- Daytime Temperature: Keep your orchid in an environment with temperatures around 70°F to 80°F (21°C to 27°C) during the day.
- Nighttime Temperature: At night, a slight drop to around 60°F to 65°F (15°C to 18°C) can encourage bloom formation.
Tip: In the fall, try placing your orchid in a cooler spot for a few weeks, such as near a drafty window, to simulate the natural temperature change and stimulate blooming.
5. Proper Watering Techniques
Orchids are sensitive to overwatering, which can lead to root rot and other problems. It’s important to water your orchid correctly to keep it healthy and promote blooming.
- Water Sparingly: Water your orchid once the potting medium is almost dry. For most indoor orchids, this means watering about once a week.
- Drainage is Key: Ensure your orchid’s pot has proper drainage, as orchids do not like sitting in water. If possible, use a pot with drainage holes or a special orchid pot.
- Use Room Temperature Water: Orchids are tropical plants, so always water with room temperature water to avoid shocking the roots.
6. Humidity and Air Circulation
Orchids love humidity, but they also need proper air circulation to prevent mold and disease.
- Ideal Humidity: Orchids thrive in humidity levels of around 50% to 70%. If your home is dry, consider using a humidity tray (a shallow tray filled with water and pebbles) beneath the orchid, or use a humidifier.
- Air Circulation: Make sure there’s a gentle airflow around your orchid. Avoid placing it in a completely stagnant area.
7. Fertilize Regularly, But Sparingly
Orchids need nutrients to bloom, but they are light feeders compared to many other plants. Use a balanced orchid fertilizer to support growth and encourage new blooms.
- Fertilizer Schedule: Feed your orchid every two weeks during its active growing phase (spring and summer) and reduce feeding to once a month during dormancy (fall and winter).
- Diluted Fertilizer: Always dilute the fertilizer to half or even a quarter of the recommended strength. Orchids are sensitive to fertilizer buildup.
8. Pruning and Cutting Back After Bloom
After your orchid has finished blooming, it’s important to care for the flower spike (stem) properly to encourage future blooms.
- Cutting the Spike: If the flower spike turns brown and dries out, cut it back completely, close to the base. If it remains green, you can trim just above a node (the small bumps on the spike). This may encourage the growth of a new flower spike from the same stem.
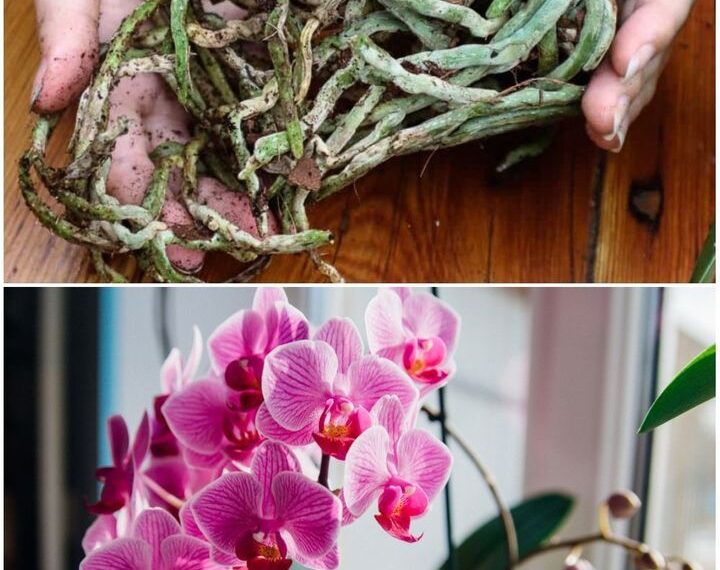
9. Repotting: Give Your Orchid Room to Grow
Over time, orchids can outgrow their pots or their growing medium can break down. Repotting your orchid every one to two years is essential for healthy growth and blooming.
- When to Repot: Repot your orchid after it finishes blooming or when the potting medium (usually bark or moss) begins to decompose.
- Repotting Tip: Choose a pot that is just slightly larger than the current one and use a specialized orchid potting mix for best results.
10. Be Patient and Persistent
Orchids require patience. Even with perfect care, it can take months for an orchid to rebloom. However, once the right conditions are met, your orchid will reward you with stunning flowers, often lasting for several weeks or even months.
Conclusion
Getting your orchid to bloom again and again is not as difficult as it seems. With the right light, temperature, watering habits, and a bit of patience, your orchid can thrive and bloom for many years. Follow these steps, and you’ll be able to enjoy the elegance and beauty of your orchid’s blooms year-round. Happy growing!
