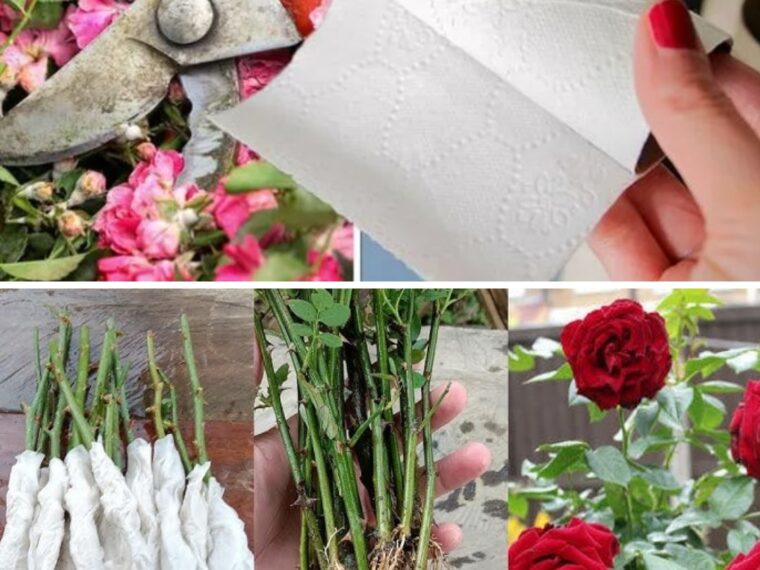
Growing roses from cuttings is a popular and effective method to propagate these beautiful flowers, but did you know that using toilet paper in this process can significantly increase your success rate? This simple, everyday item can provide the perfect environment for your cuttings to thrive. Here’s how to do it.
Why Use Toilet Paper?
Toilet paper acts as a moisture-retentive medium that keeps the cutting hydrated while also providing support. It’s an easily accessible and cost-effective alternative to other materials like peat moss or rooting plugs. The paper’s soft texture allows for gentle handling of the cuttings, reducing the risk of damage, while its biodegradable nature means it will eventually break down, allowing the roots to grow without obstruction.
Materials Needed:
- Fresh rose cuttings (about 6-8 inches long)
- A sharp, sterilized knife or pruning shears
- Rooting hormone (optional but recommended)
- Toilet paper
- Plastic bag or plastic wrap
- Small pot or container
- Potting soil or a mixture of sand and perlite
- Water
Step-by-Step Guide to Growing Roses from Cuttings Using Toilet Paper
- Select the Right Cutting:
- Choose a healthy, disease-free rose stem that is about 6-8 inches long and has at least three to five leaves attached.
- The cutting should be from a semi-hardwood section of the plant, typically taken in late spring or early summer.
- Using a sharp, sterilized knife or pruning shears, make a clean cut just below a leaf node (the point where a leaf attaches to the stem).
- Prepare the Cutting:
- Remove the leaves from the bottom half of the cutting, leaving a few at the top to aid in photosynthesis.
- If you have rooting hormone, dip the cut end of the rose cutting into the powder or gel. This step is optional but can help speed up the rooting process and improve success rates.
- Wrap the Cutting in Toilet Paper:
- Take a piece of toilet paper and dampen it slightly with water. The paper should be moist but not soaking wet.
- Place the prepared rose cutting onto the damp toilet paper and gently roll it up, ensuring that the bottom cut end is covered.
- The toilet paper will help maintain moisture around the cutting, creating an ideal environment for root development.
- Create a Humid Environment:
- Place the wrapped cutting into a small pot filled with a well-draining potting mix, such as a mixture of sand and perlite.
- Alternatively, you can place the wrapped cutting directly into a plastic bag or wrap it with plastic wrap to create a mini greenhouse effect.
- If using a plastic bag, secure it loosely around the pot, allowing some air circulation while trapping moisture to keep the cutting hydrated.
- Monitor and Care for the Cutting:
- Place the pot or container in a warm, bright location, but avoid direct sunlight, which can dry out the cutting.
- Check the cutting regularly to ensure the toilet paper remains moist. Water the potting mix as needed, but be careful not to overwater, as excessive moisture can lead to rot.
- Within a few weeks, you should start to see roots forming through the toilet paper.
- Transplanting the Rooted Cutting:
- Once the roots have developed and are visible through the toilet paper, it’s time to transplant the rose cutting into a larger pot or directly into the garden.
- Gently unwrap the toilet paper, being careful not to damage the delicate roots.
- Plant the cutting in well-prepared soil, covering the roots entirely and firming the soil around the base of the stem.
- Water the newly planted rose thoroughly and continue to care for it as you would any young rose plant.
Conclusion
Using toilet paper to grow roses from cuttings is a simple yet effective method that can greatly enhance your chances of success. This technique ensures that the cutting remains moist and supported throughout the rooting process, making it easier for you to propagate your favorite roses at home. Give it a try, and you might find yourself with a flourishing rose garden in no time!
