#4. Wooden Frame Seedling Cold Frame

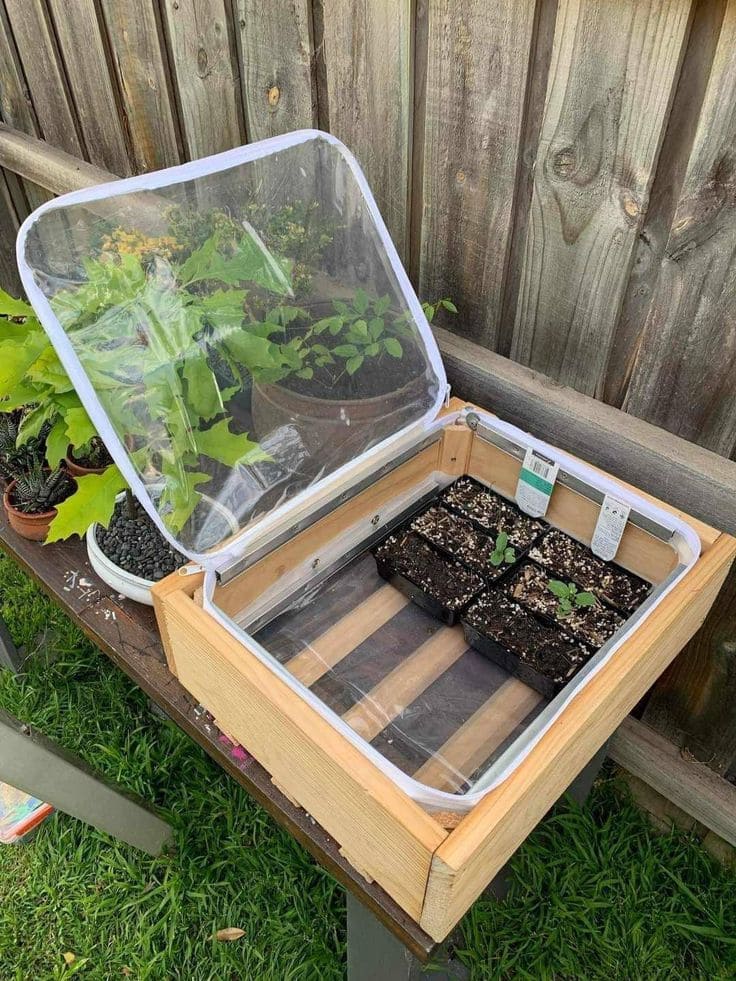
If you’ve ever lost delicate seedlings to a sudden drop in temperature, you’ll appreciate the charm and function of this tidy little cold frame.
Built like a windowed treasure chest, it lets light pour in while keeping warmth and moisture around your young plants.
Materials Needed:
- 4 wooden boards (approx. 1” x 6” x 18” each)
- Clear plastic sheet or repurposed vinyl zip cover
- Hinges (2 small)
- Screws and screwdriver
- Plastic tray or seedling containers
Step-by-step Guide:
Step 1: Assemble the wooden boards into a simple rectangular box using screws.
Step 2: Attach the clear vinyl or plastic sheet to the frame as a hinged lid.
Step 3: Place seed trays inside on a raised slat base to prevent waterlogging.
Step 4: Close the lid during cooler nights, and prop it open with a stick on sunny days for ventilation.
#5. Clear Plastic Tomato Wrap Greenhouse

This mini greenhouse may look like a giant bag, but it’s a powerhouse when it comes to guarding your tomatoes from cold snaps, pests, or heavy rain.
Whether you’re starting early in spring or stretching the harvest into fall, this method keeps the warmth in and the trouble out.
Materials Needed:
- Large clear plastic sheet or thick plastic bag (approx. 3 ft x 5 ft)
- Garden stake
- Garden twine
- Optional: ventilation holes
Step-by-step Guide:
Step 1: Place the plastic over your staked tomato plant, letting it drape down naturally.
Step 2: Tie the top closed loosely around the stake using twine.
Step 3: Weigh down the bottom edge with soil or small rocks to keep it in place.
Step 4: On warm days, untie the top or open a flap to allow air circulation and prevent overheating.
#6. DIY Tomato Collar from Dollar Store Trash Cans

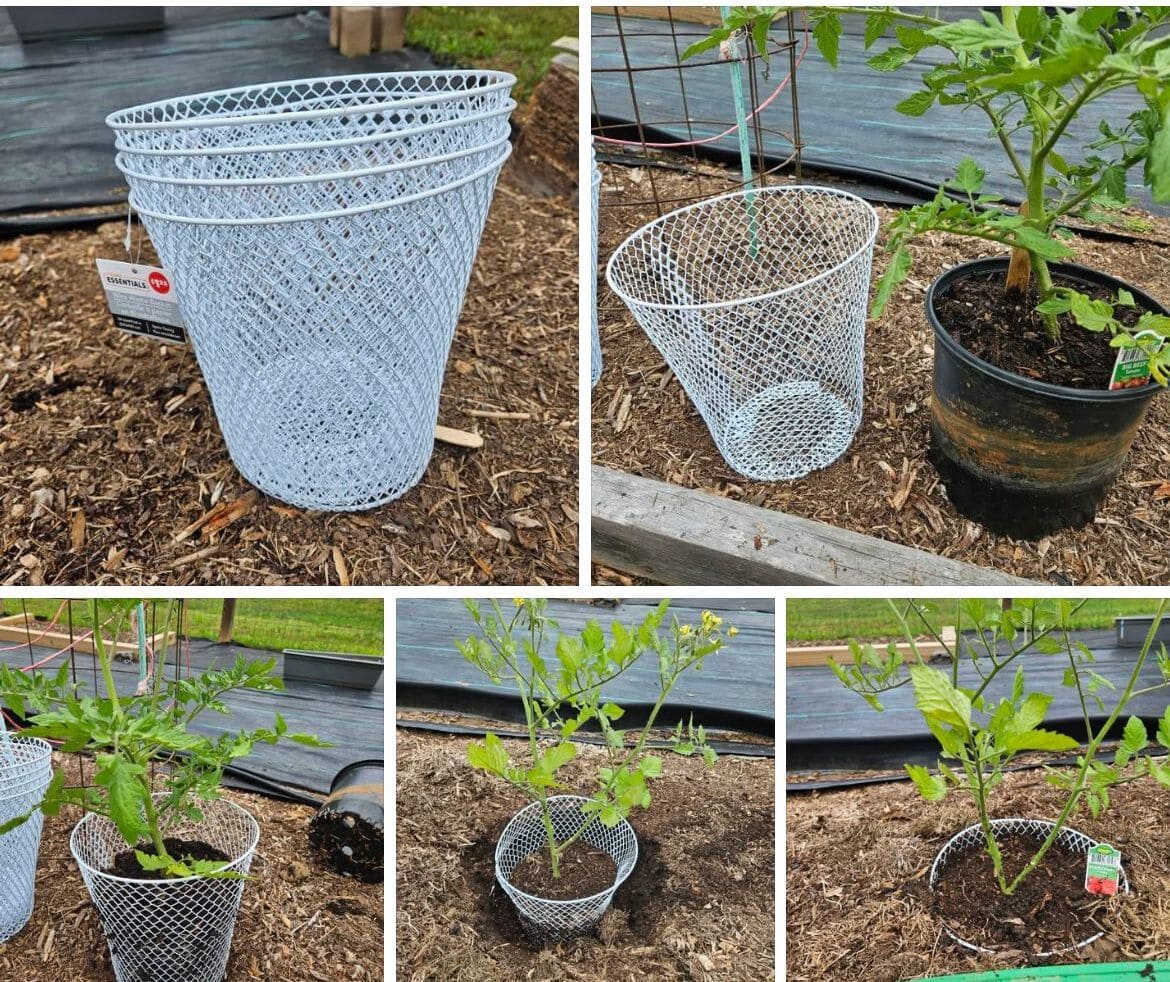
If you’ve ever battled curious critters nibbling your tomatoes or floppy stems that won’t stand tall, this project is your new best friend.
These mesh trash bins aren’t just budget-friendly, they offer instant support and gentle protection while letting air and rain flow right through.
Materials Needed:
- Metal mesh trash cans (10–12 inches wide, 12–14 inches tall)
- Tin snips (optional)
- Tomato starts or young veggie plants
Step-by-step Guide:
Step 1: Place the trash can upside down over the plant or gently lower it around the stem before planting.
Step 2: Press it about 1–2 inches into the soil to stabilize.
Step 3: If your plant outgrows the height, snip away the top ring to open it up.
#7. DIY Glass Jar Greenhouse Cloches

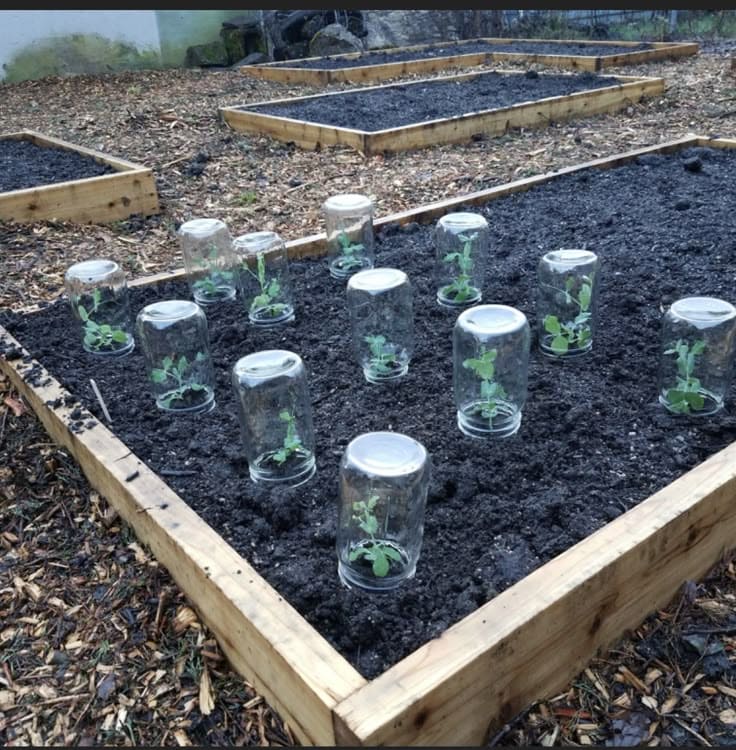
When that late frost sneaks in uninvited, your tender seedlings don’t stand a chance unless you’ve got these charming little jar cloches in place.
It’s the kind of DIY fix that feels like something your grandmother might’ve done, resourceful and quietly brilliant.
Materials Needed:
- Clean glass jars (1 pint or quart size)
- Raised garden bed
- Seedlings or young plants
Step-by-step Guide:
Step 1: Plant your seedlings evenly spaced in your bed, then water them lightly to settle the soil.
Step 2: Cover each plant gently with an upside-down jar, pressing it slightly into the soil so it’s stable.
Step 3: Remove jars during warm days for airflow, then replace at night if temps drop.
#8. Cup-Dome Propagation Greenhouse
TO CONTINUE READING THE ARTICLE PLEASE SEE PAGE 3
